And now more fun with Perfect Pearls powders! many of you may have seen or even used glimmer mist. i always wanted some but couldn't afford too many and could never figure out how to narrow it down to just a few colors. well now i don't have too and neither do you!! You can use perfect pearls - with or without reinker to create your own glimering shimmering fine mist.
Both of todays cards are based on weekly sketches i LOVE to play. the first is from Mary Jo over at
Technostamper:
 and the card (using my brand spankin new set from My Favorite Things):
 the sketch is from last week - she has a new one up for this week.
Next up is Jen's sketch:
 and the card using a set from Pink Cat Studios for the first time - do you just love her!!!!
 now there are 2 parts to this tutorial - the first part will be on the first card and the second part on the second card.
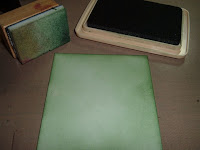
 First we will make just a pearlescent mist with no color that you can use on ANY paper you have so it becomes glimmer paper. For the first card i turned my pink patterned paper into shimmer paper (tho the camera does NOT do it justice!!
 Supplies are simple - Paper cut to the size you want, Perfect Pearl colored perfect pearls, mini mister 3/4 full of water, small "scooper" - i always use this plastic pallette knife.
 carefully scoop out a pea-sized pile of perfect pearls powder and add it to the mini mister of water. replace cap and shake very very well. you don't want the water all the way to the top or you can't mix it well enough.
 Lay your paper over a paper towel or something that will protect your work surface - waterproof if necessary - you WILL make a mess!! Spray a couple test sprays on a scrap to get the pearl mix flowing. now spray a light mist over your paper. Let dry - it WILL CURL - don't worry!! it flattens back out as it dries. I don't know why - i guess it's magic!! HAHAHAH
 Once it is dry or mostly dry check it to see if it has enough shimmer - spray again if you want more. let dry completely before using.

Next up I am going to combine two things - making a colored shimmery mist AND using a mask with shimmery mist. This is done on the second card.
 Gather supplies: Mini Mister 3/4 full of water, perfect pearl powder - any color, reinker in a coordinating color, ink pad, foam blender, cardstock cut to size, mask, repositionable adhesive, adhesive remover. You can buy pre-made masks or do it the cheap way like me and cut your own mask from cardstock with your cricut.

I want the part that shows through due to the mask to be colored, not just stark white so i lightly smudge the ink in a circular motion all over my cardstock piece.

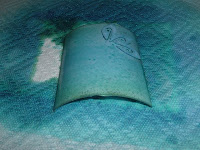
Cover the back of your mask completely with repositionable adhesive - make sure the edges are covered or the mist will seep under and mess up the effect. Attach it to your cardstock piece. (I changed mine so this pic looks different than my final card). Now make your mist - place a pea-sized amount of perfect pearls in the mini mister of water. add 12-15 drops of any color reinker to produce a darker color with more coverage. i wanted a turquoise here so i have 10 drops of stonewashed and 5 of clover. Shake well.

Place your cardstock over a paper towel or something to protect your work surface. Spritz a couple of test sprays over a scrap of paper to get the mist flowing. Lightly mist your piece. NOT TOO HEAVY - let dry and repeat for more coverage or darker color. again it will curl but it will flatten back out as it dries. Let it dry COMPLETELY before removing the mask. If any adhesive is left remove it gently with the adhesive eraser. Mount on your card.
Again i love this because it is more versatile than having a product that is ONLY glimmer mist. Plus the cost is about the same if you have to buy reinkers - you just get products with alot more uses and you can customize to your heart's desire. Not only are we going to have more uses for perfect pearls coming up i will also be doing some tutorials showing you more uses for reinkers!
enjoy!!

 and the card (using my brand spankin new set from My Favorite Things):
 and the card using a set from Pink Cat Studios for the first time - do you just love her!!!!


Great job on both sketches and the tutorial. I see you have been busy! Thanks so much for playing. Cool technique.
ReplyDeleteDid you use copics to color in the images? Love the tutorials. Thanks.
ReplyDelete