Showing posts with label stickles. Show all posts

Friday, November 7, 2008

SFYTT and Cupcake challenges (from last week...EEK!)


WOW!!! have i really gone all week without posting!??!?!?!? i hope y'all missed me - hee heee! i have some cute stuff to share today - both are based VEEEEEERRRY loosley on these two sketches - the first from Jen over at i{heart}2stamp and the second one from Taylor over at Taylored Expressions. Taylor recently launched her own stamp line and oh how i ADORE them - well christmas cupcakes were released and i just couldn't WAIT to ink them up and play!!! here are two projects done with more to come - i URGE you to run over a take a peek at them - talk about FUN!!!


I am making gift sets for my mom's open house right after Thanksgiving so these are my first two installments.


i apologize for the poor pic quality - not sure what happened........

Images are colored with copics and accented with LOTS of liquid pearls...

Again images colored with copics and highlighted with LOADS of stickles!

Close ups of both are below. i have a TON of these acrylic boxes - more than i could probably use - if you want to purchase just a few instead of the full packs like i found contact me...


SOOOOO in love with the Cuppies!!!!

Sorry for such a short post but I am runnin'ragged these days!! stay tuned tomorrow for a really cool T!m holtz inspired gift bag and new product announcement!


Tuesday, October 7, 2008

WOJ challenge #2 - Gift Set

i think this is one of my most fave projects i have ever done! i did it for the second challenge over at the Whiff of Joy challenge blog - if you still have not checked out Whiff of Joy i urge you to take a peek! so the challenge was to have stitching on your card or whatever you make. it can be any kind of stitching - machine, hand, faux or stamped. i did stamped with a great little set from technique tuesday - second stamp i ever purchased....and of course use a WOJ stamp!

i made this gift set for christmas:

YEP! that is a starbucks frappacino 4 pack all done up for the holidays! i will be fillling the bottles with russian tea mix, mint hot cocoa mix, mocha hot cocoa mix and marshmallows! i covered the cardboard holder with solid paper and then strips of patterned paper from my DCWV glitter christmas stack - love love love it!!

Here is the box without the bottles:

AND a close up up WOJ's Willow with Hot Chocolate. I colored her with Copics and stamped my stitching around her in brilliance pearlescent crimson. i added some glitter primas and prima leaves with bella dots in the centers. the handle portion is stamped with a studio G stamp that i colored in with stickles and another stitching stamp. i attached all the papers with mod podge - thinner layer than i normally use with wood.

more primas and leaves on one side:


Mixing directions and more stamped stitching:


And the bottles - more strips of paper adhered with mod podge. tags are cut on the cricut - george cart. names of the mixes are printed on my computer and a coffee cup from MFT.


Lids have a circle of paper with stickles around the edge and studio G stamps - coffee cups and "warm wishes" - this was just TOO fun. i will be doing several more!

what do y'all think???? good gift????


Thursday, August 21, 2008

gettin' scrappin' done

i have been determined to keep up with my scrppin and have joined an MSN group - scrapping friends - that is really helping motivate me. this first LO is for their weekly sketch challenge:

This one is for one of the many summer challenges - using stickles on a LO - which of course i use all the time - for this one i used a sketch from page maps (one of my faves):

been terribly busy - doesn't help that me, hubby and pezzy are sick and trev has already been hurt in football so i am driving him to the chiropractor every other day.

a new shipment of studio G halloween inks and glitter glues arrived today and are going right back out. i will have extras of the glitter glues if you haven't ordered yours yet. still waiting on a last shipment of series 16 and warmth inks.

inkadinkado has gotten more of the halloween trails clear stamp sets in finally and those are on the way. i highly recommend these stamps sets - just gorgeous.

skitterbugs - lady bug and bee are sold out. a few snails left. all beads are sold out but more were shipped from canada on monday. look for more exciting skitter critters coming soon! want to dress your skittles for the holidays...???

Thursday, August 14, 2008

skitterbugs minus the skittles for OCC challenge

So I have been doing my best to keep up with the challenges on my friend Amy's blog she does with a very talented group of girls - Our Creative Corner. The challenge is posted on Saturdays and the last one was a limited supplies challenge - NO designer/patterned paper and FOUR layers or LESS. So here is a 3 card set i came up with using some as yet uninked stamps from My Favorite Things. In addition they each have one of my newly released skitterbugs stamps.


Now i DO LOVE them with the altered skittles for their little bodies (see pic at right) but i wanted to show everyone they can be just as cutie patootie on their own!


So here are my 3 cards:

Colored with copics. New cuttlebug folder along the bottom and then inked with a versamagic dew drop (also available on my website). stickles in the center of course. The strip across the center is velvet paper. shape is the new storybook cricut cartridge, dots are liquid pearls and then each corner has a kaiser stick on pearl. little bee skitterbug.

another new CB folder and lots of the new glitz stickles - ruby slippers, colored with copics, red is another velvet paper. scallopped oval is cut with nestabilities. Little ladybug skitterbug.

finally, top and bottom are velvet paper embossed with CB borders. stickles dots and a little snail skitterbug.

for an update - my altered beads for these are completely sold out :( but no worries!! order away and they will be shipped straight from sugar n scraps in canada. i still have stamps left but they are going fast! in addition i have three more in production that i am sure you will love including one for halloween!

don't forget to sign in for blog candy on yesterday's post!!!

now off to work i go - meaning holy mess batman - my kitchen looks like an explosion!!!!!!!

Saturday, June 14, 2008

Got Pink Cat????

YAY i finally finished! I have been working on this one for a couple weeks in stages :) this is a wooden crate from Michaels or AC Moore i forget which. My poor darling daughter's toys are in costco boxes - never got around to do anything as fast as she has collected play things. SO i knew i wanted to paint one of these up for her and i was COMPLETELY inspired when i packed up a customer's order recently **waves to lesley** - she bought a bunch of Ranger paint dabbers in the Brights family along with black and when i lined them up THEY LOOKED AMAZING! so i painted the letters with them and then painted the crate black (obviously not a paint dabber on that one - i like my products but i'm not insane....wellll). i had not used the paint dabbers ever until just recently tho i have painted ALOT of wood projects in my day. well OMG does it get any easier??????? no mess no cleanup, grab your color, paint and you're done. and HOW PERFECT for kids even!!!! oh what fun my boys would have had with these with far less abuse of my breakfast room table........dab them for texture, swipe them for smoothness.

anywho! i wanted to do something other than leave it totally black (i mean she IS a girl right!) but what goes over black....not much! then i started thinking about the new Ranger pigment ink pads i also just got in. hhhmmmm.. so i whipped out all of the scrolly/flowery Pink Cat Studio stamps i have and my snow cap white pigment pad and stamped randomly all over the black crate.
Now we have the basics but of course every little girls needs some BLING! First the letters - i sprayed them with gold pearl mist (perfect pearls and water), stamped scrolls in black pigment ink and then dotted with black diamond stickles - the stamps have lots of dots.

next i used stickles that matched all the colors of the letters and dotted it on the stamped dots all over the black crate - it REALLY pops!


and here is little miss giving it a final inspection:

she had been playing with the letters so she is a little concerned that they are stuck to the box.....

and testing for comfort........


is it bad if i think she is TOO CUTE for words!!!!!!

don't forget to check the new goodies in the store.......

Friday, June 13, 2008

Thinking Outside the Block Fridays are HERE!

Welcome to the first installment of Thinking Outside The Block Fridays!!


I hope ya'll like these tutorials and get some use out of them.


But first I have a card to share using the sketch at Technostamper:


This is the father's day card i made for my step-dad. He loves music and plays several instruments. So I paired the little dancing with pez stamp with some great music patterned paper from CTMH. I just love blue and brown together! Pezzy is colored with copics.

The blocks i will be using for these segments are the ones that come with all of the studio g $1 stamp sets, however the techniques presented can be used on anything acrylic - acrylic frames, albums, cut outs. If you don't collect the Studio G stamps but would like the blocks to complete any of these projects they can be purchased from the store.
Here is the project for today:

I'll start with a rundown of suplies I have found work well. First adhesives:


The E6000 is what i use to glue the blocks together. It is fairly strong and dries clear. Glossy Accents and Zip Dry are great for glueing on the embellishments. Both dry clear which is important when working with acrylic!


Next up is ink. I have found that Ranger's Pigment inks and Brilliance Dew Drops Pigment inks work exceptionally well. I am sure there are others too, such as StazOn but I have not used them at this point. I love the Brilliance Pearlescent colors for acrylic because they are SO shimmery and it just adds to the crystal quality of the acrylic. The pics don't do them justice but i tried!


The Dew Drops are just smaller versions of the regular ink pads and I like these for several reasons - they are cheap, easy to store away, and their shape makes it easy for inking a stamp with multiple colors. I recently decided to add these to the store and you can get them here - the buttons should be up by Saturday morning!
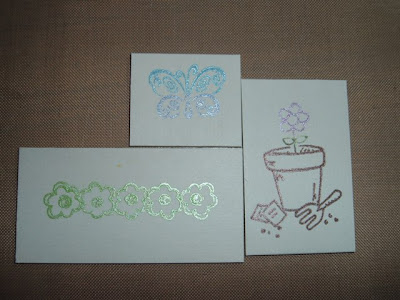
They are just as incredible on plain paper too!

there are 18 pearl colors plus several metallics.

The first step for the project here is to create the "aged tile" effect. I do this with alcohol inks. Alcohol inks are made for slick non-porous surfaces and so they are perfect for these acrylic blocks. You will need the alcohol ink blending tool and felt (not the foam).
I used Latte alcohol ink here. We will only be inking the edges of our blocks so you only need ink on one edge of your felt. just squeaze some drops onto the felt. it is better to add too little and then add more. you can also add a drop or two of blending solution - this will lighten the color.

ink all four sides of each block you are using for your project. The alcohol ink dries fairly quickly.

Next we will glue all of the blocks together. run a small line of E6000 glue down one side of a block and attach the next block to it - don't push too hard or all of the adhesive will squish out. I lay mine out as I glue them either on my Ranger non-stick craft mat or my card table which is covered in vinyl - sometimes a bit of glue will leak out on the back and it doesn't stick to these. I let them dry overnight at this point.

Now time to decorate. I chose to put a picture on the back but you could also put a stamped image. for the pic i placed a tiny drop of glossy accents on each corner, glued it to the back of my blocks and then laid it down to dry flat. I used some SU stamps and Brilliance Dew Drops - chocolate and sky blue and stamped my design on the blocks. THIS INK MUST BE HEAT SET to dry. I use my heat gun under a good strong light so i can see the slight color change as it dries.

The primas and bead pops are attached with Stickles Cinnamon - Stickles also works FABULOUSLY on acrylic. I added stickles dots around the edges. The hanging ribbon is attached to the back of the picture with zip dry glue.


If you decide to play along I'd love to see your creations - please leave a comment with a link to your project - if you choose to upload to splitcoast please use TOTB so we can find them all in one place. Stay tuned next Friday for another exciting project!