Showing posts with label perfect pearls mist. Show all posts

Wednesday, December 21, 2011

pearl mist video!

hi all!

posting from the depths of christmas prep hell!  anyone else???  marathon baking yesterday.  i have decided i despise cake pops...alot...and stores that run out of things before christmas...like white candy melts.  thus snowmen cake pops with sprinkles....at least pezza loved them!


we headed in to DC this past weekend for hubby's work christmas gathering.  we sat with my two fave couples and i had lots of fun.  i love DC and don't get out there like i used to since pezza was born.  can't wait until i can take her to the smithsonian museums and stuff.  used to love doing that with the boys.

but onto my project - today's fun includes a video for ya!  i LOVE LOVE LOVE perfect pearls mica powders by ranger - they are the BEST for so many things!  and a great one is making your OWN shimmering pearlescent mists in ANY COLORS YOU WANT and the video at the end of the post shows you all about it.  it is sponsored by FaveCrafts.com - a super place to browse for all sorts of free tips, project instructions and info.  You can mix up your pearl mists two ways - one is just perfect pearls and water in a mini mister - all shimmer in whatever color PP you use but no heavy color.  i really love to spray this mixture onto regular patterned paper so i get shimmer paper!  that is what i did on the dark green strip on these cards - i sprayed the full page and then cut it to use on all of the cards:

really hard to catch the shimmer on camera though :(

i used papers from the same paper pad so they would all coordinate and kept the overall design simple for mailing and for quickness!

the images are just right stamps from like 2 christmases ago that i HAD to have when they came out and did not put to good use.

i colored them with colored pencils of course

i really had fun coloring up these little images - quick n easy!  here's the video - be sure and leave a comment so i know what you think of it!


Monday, August 18, 2008

OCCC challenge - another reinker tutorial...

Here is the sketch challenge from OCC for this week:


And my card - playing with my SU stampin wheel again! i only have two wheels - it is fast becoming apparent to me that i need more.... Dots are dimensional pearls again.


Here is a close up of the piece i am going to show you how to do - the portion where i stamped the flowers started out as blank white cardstock.


And here is another LO that i used a couple pieces on too:

The primas have been waiting for just the right moment :) i have had them since winter CHA! title is cut with the cricut storybook cart. i used the Studio G black $1 glitter glue on the title and flower centers. ALSO learned how to swirl my text!!! the LO is for a contest over on the Paper Patch Craft message board (where the primas also came from).

SO gathering our supplies: reinkers, mini mister full of water and perfect pearls (i used pearl), FOAM piece (not felt) and the ink blending tool, white cardstock.


I inked the foam piece with reinker in much the same way you ink a felt piece with alcohol ink. a couple tips i read recently on T!m's blog - leave space between the colors and choose colors that are next to each other on the color wheel or at least NOT direct complimentary colors since mixing complimentary colors makes the color "mud" - next spritz with the perfect pearls mix.


Now dab the sponge onto your cardstock in a random pattern turning the applicator at different angles. the reinker does not go as far as the alcohol ink so if you do a whole piece of paper you will need to reink and spritz several times.


Here is a close up of one of the pieces on the LO. hard to capture the shimmer with the camera since it was not very sunny when i took the pic.

i hope you all give it a try!!

have a great day!!!


Tuesday, August 12, 2008

Do your skittles want to play dress up??? new stamp release!

To answer some questions on the skitterbug stamps - i drew them myself and they can not be purchased form anyone else. the skittles i used are died and then painted by hand by Catherine (my sidekick-hee hee) - she will have pics of her snail shells tomorrow - they are better than my attempt :)

is it really the END of the day????? good heavens where did it go??
so do you remember these gorgeous flowers we sprayed with shimmer mist yesterday? well they ar eback to help me introduce some new additions to my rubber stamp line!


I am using fridays cupcake sketch from taylored expressions:

now what on earth are skittles some of you may be asking. Skittles are very similar to the robin's nest dew drops and i currently carry many altered "skittles" as bead pops on my website. they were nicknamed skittles after the screen name of Catherine, the girl who does the altering. and so we got to thinking and here is what we came up with:

And now some close ups:


And the stamps:


i know the pic is insufferably tiny but click here to see them on my website! Now it is simple to dress up your skittles - simply stamp the little bugs and add skittles. each set comes with 8 alterd skittles (or bead pops) and more can be purchased if you want them. You can also make your own OR simply use the little cuties on their own as stamps. more samples to come!!

In addition don't miss my little giveaway i posted yesterday - a pack of SEI's velvet paper - oh so yummy! just post a comment on yesterday's post by 3am eastern time wednesday - i will pick a winner when i get up! i'll have more to giveaway tomorrow!


Sunday, August 10, 2008

BLOG CANDY plus SFYTT ala pearl mist re-visited - reinker tutorial #1 AND BLOG CANDY

hi all! i decided to talk a bit about reinkers this week in our tutorials. i think reinkers can often be an under-loved supply. of course, they can be used to add more ink to a pad that is running out but there are other ways you can use them too. my sample card today is from Jen's Sketch For You To Try:


and here is the card (minus a sentiment):

This card has a number of different pearl mists made using perfect pearls, water and reinker in a mini mister. The main image is from Inkadinkado and i inked it up using the Royal Satin Kaleidacolor pad. The circle design is cut from the storybook cartridge on my cricut. all pieces are matted with brushed gold paper from SU.

most folks love the shimmery sprays and so do i but i could not afford the glimmer mists. then i came across this little recipe on T!m Holtz's blog and i have been spraying everything since! It is so inexpensive since the "ingredients" have other uses too.


So gather supplies: for each color you want to make you need perfect pearls, reinker, a mini mister, a little "scoop" and white cardstock.


Fill the mini mister 3/4 up with water. add 10 drops or so of reinker - it does not need to be distress re-inker. Add a pea-sized scoop of perfect pearls. shake really really well.


I always spritz on scratch paper the first few times to get the colored mist flowing. i made four different colors to show here but it is very difficult to truly see the differences. in one i had just gold perfect pearls and water - no reinker. one had eggplant reinker and forever green perfect pearls. one had currant reinker and bronze perfect pearls. the last one was cranberry reinker and pearl perfect pearls.


On my first piece of cardstock i used the eggplant spray - i got a deep purple color with green shimmer in the light. and the currant spray which was a deep red color with a bronze shimmer. the colors blend together well.


when you first spray the paper it will curl up but don't worry. it straightens up on it's own. if you want deeper color or more shimmer you can do a second coat.


I sprayed the stamped image with the gold spray - no reinker. this leaves shimmer only (gold in this case) and no color.


i also sprayed the gold spray on the green card base as well so i am left with a card that is still green but with a golden shimmer.


Here is another piece i sprayedwith all three colored sprays. For the final card i had one piece sprayed with cranberry and pearl PP - this piece i cut and put through the cuttlebug in one of the new embossing border folders. the other two colored piece i cut in the cricut. the pierced holes were done using my T!m Holtz design ruler.


while i was spraying.....we were talking on Scrapping Friends about spraying white flowers to match your project and making them all shimmery. so i dug out some white primas:


and one red one :)


and i sprayed away with my leftover shimmer sprays. i did one in each color, one with the gold only and the red one with gold only too.


and here they are! once again the camera doesn't begin to do them justice. but the reinker really gives vibrant good coverage. stay tuned tomorrow to see what i have used these on - I have a new product i am releasing tomorrow....do your skittles want to play dress-up????


AND NOW SOME IMPORTANT stuff - goodies!!!!!! for my first giveaway i have a pack of the gorgeous velvet paper i have been raving about!


to enter leave me a comment - it can be on anything you want me to know :)


Tuesday, July 1, 2008

perfect pearls cont'd - custom pearl mist

And now more fun with Perfect Pearls powders! many of you may have seen or even used glimmer mist. i always wanted some but couldn't afford too many and could never figure out how to narrow it down to just a few colors. well now i don't have too and neither do you!! You can use perfect pearls - with or without reinker to create your own glimering shimmering fine mist.

Both of todays cards are based on weekly sketches i LOVE to play. the first is from Mary Jo over at Technostamper:

and the card (using my brand spankin new set from My Favorite Things):
the sketch is from last week - she has a new one up for this week.

Next up is Jen's sketch:

and the card using a set from Pink Cat Studios for the first time - do you just love her!!!!
now there are 2 parts to this tutorial - the first part will be on the first card and the second part on the second card.


First we will make just a pearlescent mist with no color that you can use on ANY paper you have so it becomes glimmer paper. For the first card i turned my pink patterned paper into shimmer paper (tho the camera does NOT do it justice!!


Supplies are simple - Paper cut to the size you want, Perfect Pearl colored perfect pearls, mini mister 3/4 full of water, small "scooper" - i always use this plastic pallette knife.


carefully scoop out a pea-sized pile of perfect pearls powder and add it to the mini mister of water. replace cap and shake very very well. you don't want the water all the way to the top or you can't mix it well enough.


Lay your paper over a paper towel or something that will protect your work surface - waterproof if necessary - you WILL make a mess!! Spray a couple test sprays on a scrap to get the pearl mix flowing. now spray a light mist over your paper. Let dry - it WILL CURL - don't worry!! it flattens back out as it dries. I don't know why - i guess it's magic!! HAHAHAH


Once it is dry or mostly dry check it to see if it has enough shimmer - spray again if you want more. let dry completely before using.

Next up I am going to combine two things - making a colored shimmery mist AND using a mask with shimmery mist. This is done on the second card.


Gather supplies: Mini Mister 3/4 full of water, perfect pearl powder - any color, reinker in a coordinating color, ink pad, foam blender, cardstock cut to size, mask, repositionable adhesive, adhesive remover. You can buy pre-made masks or do it the cheap way like me and cut your own mask from cardstock with your cricut.
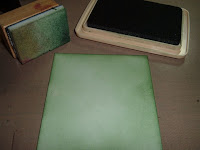


I want the part that shows through due to the mask to be colored, not just stark white so i lightly smudge the ink in a circular motion all over my cardstock piece.

Cover the back of your mask completely with repositionable adhesive - make sure the edges are covered or the mist will seep under and mess up the effect. Attach it to your cardstock piece. (I changed mine so this pic looks different than my final card). Now make your mist - place a pea-sized amount of perfect pearls in the mini mister of water. add 12-15 drops of any color reinker to produce a darker color with more coverage. i wanted a turquoise here so i have 10 drops of stonewashed and 5 of clover. Shake well.
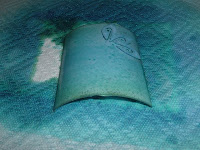
Place your cardstock over a paper towel or something to protect your work surface. Spritz a couple of test sprays over a scrap of paper to get the mist flowing. Lightly mist your piece. NOT TOO HEAVY - let dry and repeat for more coverage or darker color. again it will curl but it will flatten back out as it dries. Let it dry COMPLETELY before removing the mask. If any adhesive is left remove it gently with the adhesive eraser. Mount on your card.

Again i love this because it is more versatile than having a product that is ONLY glimmer mist. Plus the cost is about the same if you have to buy reinkers - you just get products with alot more uses and you can customize to your heart's desire. Not only are we going to have more uses for perfect pearls coming up i will also be doing some tutorials showing you more uses for reinkers!

enjoy!!