
I hope you have all been having a wonderful Holiday season! I must admit I am looking forward to a new year - this one has been a rough ride. I am really hoping my new year includes more studio time.
Recently I was asked my a friend and Sizzix designer,Eileen Hull, to design some things for CHA using some of her new Scoreboards Dies. May I present Artist Trading Blocks!

How cute are these little guys??? And really fun too! To be quite honest I was a little perplexed when they arrived as it was something new to me but I decided to just dive right in and I had a blast. Today I am going to give you a step by step to create the center one. These will be on display at CHA in the Sizzix booth.
SO let's begin with Score Boards - what the heck are they??? Straight from the Sizzix Score Boards website:
"If it’s chipboard or mat board, then ScoreBoards Dies expand your creativity with quick and easy cuts and scoring. The first-ever product of its kind, ScoreBoards Dies produce sturdier boxes, pockets, holders and other ultra-versatile designs. Use board thickness from .040" to .055" for best results."
The Box dies create these boxes. Super easy to decorate and a snap to put together. The largest one is available now and the smaller sixes will be available soon.
So let's get started! Here is what they look like nekkid!

You need TWO pieces to create the box. Each piece has 3 sides and a tab on each end where your Score Tape will go to put them together. you can see the score lines on each one. Now when planning out your design line the two pieces up as shown so everything is facing the right way or one of your sides will be sideways (guess how I know :P) Here are the steps I used to create my flower garden Artist Trading Block in the middle of the first picture.

I began by adding texture - I can NOT pass up texture pastes and stencils, nope, just can't do it. This time I decided to do it at the very start using Modeling Paste. Let it dry.

Next I gave it a base coat of Titan Buff acrylic paint - sort of a light tan neutral color. Let it dry.

Now it's time for some shimmering color! I took 3 Primary Elements Artist Pigment Powders by Luminarte (truly the grandest of things in my studio) in Apple Blossom, French Lilac & Wintermint & I mixed them with Slow-Dri Blending Medium - this just gives me a nice liquid glaze-type paint. I randomly dry brushed them across the surfaces - I left some areas unpainted.

I wantd to give my texture a bit of extra pizzazz sso I very lightly brushed on Inka Gold in Old Silver across the raised areas with my fingertip. If I used a darker color the effect would be even more dramatic but i was going for soft here.

I also added some embellishing. I dug around in my misc. soft things drawer (really, there is no other way to describe it but I know exactly what I can find in there...) and I pulled out these felt die cuts and stacked them to make flowers - little glittered skittles int he middle. Then took a black pen and doodled some additional stuff and even took the plunge and WROTE my little saying in my own handwriting! Not something I am usually comfortable with!
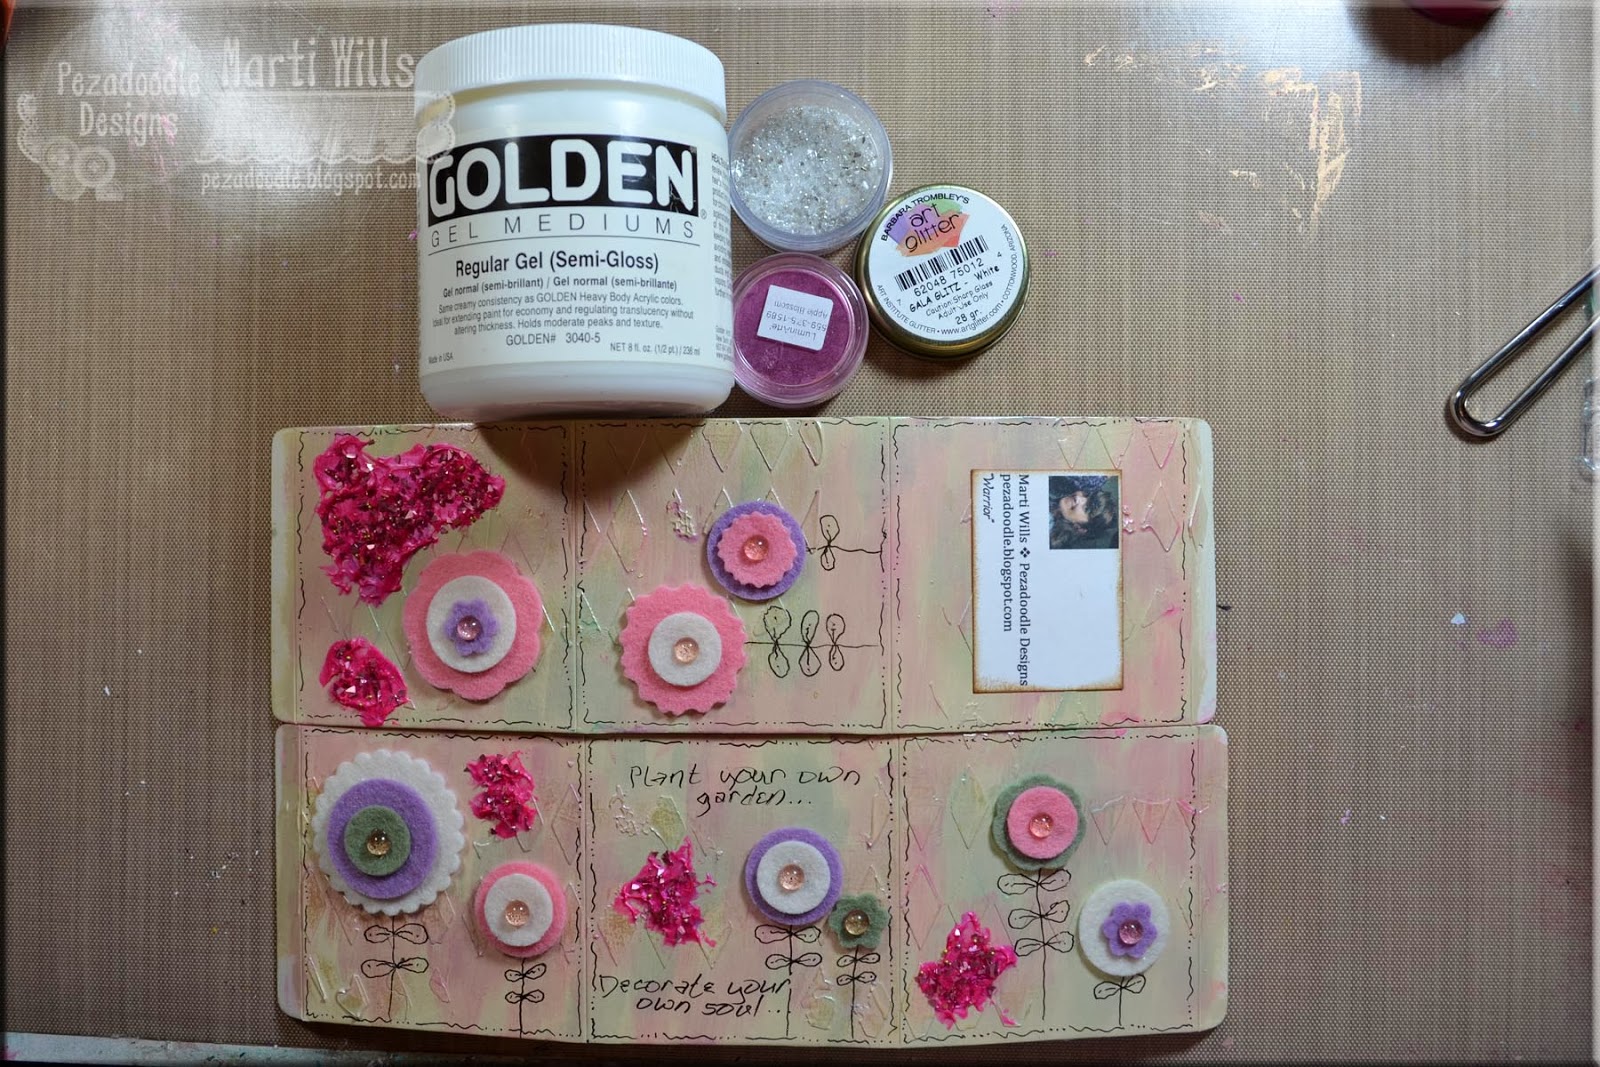
And then, because I couldn't resist (?) I added some bright pink highly textural "messes" here and there. I mixed that same Apple Blossom Primary Elements Artist Pigment Powder into some Gel Medium and globbed it on in various places. Then I sprinkled in some pink Gala Glitz (Fab stuff - you really need some!)

It is from Art Institute Glitter and is a mix of different sizes and colors of glass glitters and different colored micro beads - neat huh?

Hubby suggested my garden needed a little ground and I thought of just the thing - something I love but had not pulled out in awhile - Elements Earth Textures - also from Art Institute Glitter. This time I dabbed on the Gel Medium straight and sprinkled it on - the gel dries clear.

And here is the finished piece - laid out and ready to glue! I really like the way this combo of steps turned out too and may use it again on some flat pieces too - I am unsure how my little blocks will fare at CHA.

Past experience has shown me that CHA handling can be a bit rough!

I will post more about the other two ATBs soon! In the meantime head over and check out what the other artists have been doing with these by visiting the ATB blog and Facebook page!


