Hi all!
Happy Halloween! Boy is Pezza excited! We are having a few neighbors over for pizza and then heading out to load up on candy. It's a strange phenomenon really - I just threw out the last of her Halloween candy from last year BLECH!
Today is one of those days when I realize I have far more on my to-do list than is humanly possible! I got all of your bday party invites done so we can hand them out at school when we go eat lunch with her today, then prepping for an Origami Owl party tomorrow, my kids mixed media class after school, home for dressing up and off to trick or treat and SOMEWHERE in there I need to go into town and buy a big table.
I wanted to put up a quick post though - awhile back my friend Suzanne posted a link on Facebook to some velvet pumpkins and I about died when I saw the price! A set of 3 was like $78 or something ridiculous! Especially ridiculous because I knew how easy it would be to make them myself and so I set about doing that and am just now getting around to posting it!
One important thing about the pumpkins - they had REAL actual pumpkin stems so that was my first mission. You can buy them on Ebay (can't you buy EVERYTHING on Ebay?) But I was not going to pay for that either! I got lucky, hubby makes fun of me because I always just kick our rotting pumpkins right off the porch into the flower bed behind the boxwoods - so guess what I found back there? Dried pumpkin stems! Yea baby! I also went up to the nursery that had a pumpkin display and asked for stems that had fallen off - the guy thought I was nuts. He kept saying So you just want the STEMS???? Then he turns and calls his buddy - HEY! This crazy lady wants pumpkin stems! I told him it was for a project that was really popular in blogland. He said he didn't even know what that was. BUT he said I was welcome to walk around and collect any pumpkin stems I found so I did. I also thought I would make it to a pumpkin patch and get some more there but that has NOT happened. BOO.
Next the velvet. Now real actual velvet can be pricey and to be honest the fabric stores near me are quite lacking in the velvet department - NO good colors. But they did have this velvet knock off stuff at Joanns - only three good colors and I didn't make it the hour to the good fabric store to look for more colors either. So I made do with what I found cheaply and easily and here ismy little set:
SO EASY! I just cut the circles - didn't even try to make them perfect - and then stitched a large stitch around the cut edge. you want big far apart stitches not close tiny stitches with a good heavy thread.
Then I just pulled the thread on one side so it gathered up the fabric, stuffed them and pulled tight so the opening was small. I knotted the string and glued the stems on with a hot glue gun. Start to finish it was probably a 30-40 minute project!
I hope you all have a great time tonight whether you are collecting candy or disbursing it!
Thursday, October 31, 2013
Friday, October 18, 2013
Getting spooky for the latest Cut It Up Challenge!
Hi all!
Ahhh Friday. I am hoping to get some fall decorating done around here - you know before fall is OVER. I can't get to the bins by myself so Kevin was finally able to help me last weekend but our week just flew by without us ever touching it! So we just tripped over the bins all week instead. I LOVE pumpkins - all sorts of pumpkins and pumpkin type decor. I already have too many and still had ideas for more!
We have a few Halloween items to put out too but I like to keep it mostly Fall so it can all stay out longer. Thankfully we got Pezza's Halloween costume back in September because a neighbor was telling me they have been very difficult to find already. Equally difficult to find already - current release Halloween scrapbook papers. Today is the new Cut It Up Challenge reveal and our theme is Halloween. I went to get the new Doodlebug papers I saw at CHA - sold out. ACK!!!!! SO disapointed! Hopefully I can still find some online for this years Halloween pics but for last year's that I scrapped for this challenge I had to scrounge around in my stash. I was very unhappy BUT I ended up liking the layout after all so I am going to let it go! Hahhahah! But as soon as I am done typing this I am getting my order in over at A Cherry On Top!
So yes our challenge was to do something with a Halloween or Dia De Los Muertos theme AND use a die cut of course! Last year Pezza was a cat - I know big surprise!
So how ridiculous is my daughter? Look at those poses! Sheesh. Anyway I used some SVG cut files from My Scrap Chick and cut them on my Black Cat Cutter. We just got Boo'ed today so I may need to go back over to the site and grab some of her Halloween treat bag toppers!
Each of the little characters is so cute! I inked all of my edges with my Tsukineko inks - love them! My ghostie's bubbling brew got some stickled bubbles too!
I used my Peachy Keen face stamps for the faces. Unless I cut my characters out really large messing with the teeny facial feature cuts drives me batty!
Just had to add the cute little haunted mansion!
I just had to throw in this cute little kitty digi from Louby Lou! 1. it's a cute kitty, 2. I don't color nearly enough anymore and 3. Louby Lou is our sponsor for the challenge this go 'round! As usual she is colored with colored pencils - Faber Castell Polychromos this time I believe it was. now do you see that cute little sparkly green embellie in the corner? Anyone here remember those? I carried them in my online store. I am on a mission to get rid of my inventory and finally take the store website down as it is costly to continue to maintain. So GO OVER THERE and pick out a few colors for yourself!
I discovered a fun and easy little trick in Photoshop I have been playing with and wanted to share it with all of you. An easy way to add a title or single word piece to your layout is to put it on your photo. I made my date into a little frame. Here's how:
3. Choose fixed size and then put your measurements in - in this case I put 3.75 x 5.75 and made it white since I wanted my frame white. Click on your blank page and the shape will appear.
4. Now we are going to do the same thing but this time make it slightly smaller - I did the next one 3.5 x 5.5 and made it black, Click on your page and it will appear.
5. Now move them so that the second one is perfectly spaced inside the first one - the white edges are your frame. Merge the two layers
6. Choose your magic wand tool and click on the inner shape - it will be highlighted by the "marching ants." Now choose your eraser and erase the whole thing - only the inner shape will get erased. Click again to get rid of the marching ants.
7. Choose your type tool, pick a font and make it the same color as your frame, type what you want. Position it on your frame the way you want it.
8. Choose your eraser, make sure to select the layer with the frame, erase the portion of the frame that appears behind your font. Merge layers.
9. Now you can drag your frame onto your picture!
Now come join us on the Cut It Up Challenge blog and check out the rest of the Design Team's projects and then submit yours for the challenge! You could win a $5 gift certificate to Louby Lou's Digital Delights!
So what do you think of the layout? How about the frame tutorial? Let me know!
Ahhh Friday. I am hoping to get some fall decorating done around here - you know before fall is OVER. I can't get to the bins by myself so Kevin was finally able to help me last weekend but our week just flew by without us ever touching it! So we just tripped over the bins all week instead. I LOVE pumpkins - all sorts of pumpkins and pumpkin type decor. I already have too many and still had ideas for more!
We have a few Halloween items to put out too but I like to keep it mostly Fall so it can all stay out longer. Thankfully we got Pezza's Halloween costume back in September because a neighbor was telling me they have been very difficult to find already. Equally difficult to find already - current release Halloween scrapbook papers. Today is the new Cut It Up Challenge reveal and our theme is Halloween. I went to get the new Doodlebug papers I saw at CHA - sold out. ACK!!!!! SO disapointed! Hopefully I can still find some online for this years Halloween pics but for last year's that I scrapped for this challenge I had to scrounge around in my stash. I was very unhappy BUT I ended up liking the layout after all so I am going to let it go! Hahhahah! But as soon as I am done typing this I am getting my order in over at A Cherry On Top!
So yes our challenge was to do something with a Halloween or Dia De Los Muertos theme AND use a die cut of course! Last year Pezza was a cat - I know big surprise!
So how ridiculous is my daughter? Look at those poses! Sheesh. Anyway I used some SVG cut files from My Scrap Chick and cut them on my Black Cat Cutter. We just got Boo'ed today so I may need to go back over to the site and grab some of her Halloween treat bag toppers!
Each of the little characters is so cute! I inked all of my edges with my Tsukineko inks - love them! My ghostie's bubbling brew got some stickled bubbles too!
I used my Peachy Keen face stamps for the faces. Unless I cut my characters out really large messing with the teeny facial feature cuts drives me batty!
Just had to add the cute little haunted mansion!
I discovered a fun and easy little trick in Photoshop I have been playing with and wanted to share it with all of you. An easy way to add a title or single word piece to your layout is to put it on your photo. I made my date into a little frame. Here's how:
- Open a new blank photoshop file. Size it as big as your picture - in this case 4 x 6.
- Choose your shape tool - pick your rectangle and then specify the size by clicking on the little arrow so the drop down menu appears. You can see it below just under the word Window.
3. Choose fixed size and then put your measurements in - in this case I put 3.75 x 5.75 and made it white since I wanted my frame white. Click on your blank page and the shape will appear.
4. Now we are going to do the same thing but this time make it slightly smaller - I did the next one 3.5 x 5.5 and made it black, Click on your page and it will appear.
5. Now move them so that the second one is perfectly spaced inside the first one - the white edges are your frame. Merge the two layers
6. Choose your magic wand tool and click on the inner shape - it will be highlighted by the "marching ants." Now choose your eraser and erase the whole thing - only the inner shape will get erased. Click again to get rid of the marching ants.
7. Choose your type tool, pick a font and make it the same color as your frame, type what you want. Position it on your frame the way you want it.
8. Choose your eraser, make sure to select the layer with the frame, erase the portion of the frame that appears behind your font. Merge layers.
9. Now you can drag your frame onto your picture!
Now come join us on the Cut It Up Challenge blog and check out the rest of the Design Team's projects and then submit yours for the challenge! You could win a $5 gift certificate to Louby Lou's Digital Delights!
So what do you think of the layout? How about the frame tutorial? Let me know!
Thursday, October 17, 2013
Cute Purse Day!
Hi all!
It occurred to me when I was contemplating how much better I have been feeling and how far I have come that I should share it with y'all. I have been off my meds about 9 months or so now I think it is. I am happy to report that I am feeling much better and far far more stable! And happy! And lucky. I know not everyone will have the same road and I do still have to be very aware of my thoughts and perspectives and how I react to the things around me but I am doing well and feel much better physically as well!
I still have some struggles though and one of them is balance - wow do I lack balance in my life! I also struggle with having reasonable expectations on myself - Pezza is in school right now and I don't work so I should be super human and be able to do everything plus more right?!?!? I seriously don't know HOW I raised my 2 boys ALONE while working AND putting myself through college full time! Of course I was younger then! I spend a lot of times feeling like I am running in circles and not accomplishing as much as I'd like to (or those around me would like for me to!)
Most significantly - I have not been crafting nearly enough BUT I did take some time recently to get a little sewing done and made a purse for my step mom!
The pattern is really easy and for such a little purse it is very roomy! I have made it a couple times but Pezza keeps on stealing mine! The pattern is called Patty's Bag by Sewphisti-Cat and goes together fairly easily.
I just LOVE both the Daisy fabric and the pale orange butterfly fabric and they went well together - all from Joann Fabrics.
Do any of the rest of you sew at all? If so, what is your fave thing to make?
It occurred to me when I was contemplating how much better I have been feeling and how far I have come that I should share it with y'all. I have been off my meds about 9 months or so now I think it is. I am happy to report that I am feeling much better and far far more stable! And happy! And lucky. I know not everyone will have the same road and I do still have to be very aware of my thoughts and perspectives and how I react to the things around me but I am doing well and feel much better physically as well!
I still have some struggles though and one of them is balance - wow do I lack balance in my life! I also struggle with having reasonable expectations on myself - Pezza is in school right now and I don't work so I should be super human and be able to do everything plus more right?!?!? I seriously don't know HOW I raised my 2 boys ALONE while working AND putting myself through college full time! Of course I was younger then! I spend a lot of times feeling like I am running in circles and not accomplishing as much as I'd like to (or those around me would like for me to!)
Most significantly - I have not been crafting nearly enough BUT I did take some time recently to get a little sewing done and made a purse for my step mom!
I just LOVE both the Daisy fabric and the pale orange butterfly fabric and they went well together - all from Joann Fabrics.
Do any of the rest of you sew at all? If so, what is your fave thing to make?
Sunday, October 13, 2013
Around the House - It's Apple Time!
Hi all!
We are finally starting to feel (and look) like fall around here and that means APPLES. Now I realize apples are freely available all year yada yada but fall is supposed to be apple time. I think there are even places around here where we could go and pick our own apples but we have never done that before. Recently my buddy Suzanne posted pics of homemade apple chunky apple sauce and I had to give it a try! WHY I have not done this before is beyond me since I have always loved to cook! So my first go 'round I took 3 kinds of apples (Fuji, Gala, and Golden Delicious) - using several kinds adds depth AND some break down more while others stay chunky so it depends on what you want. And no I do not know which ones break down and which don't but I THINK the Golden Delicious stay the firmest.....Anyway, I cut them up, threw them in a crock pot, sprinkled with cinnamon, apple pie spice and sugar and let the crock pot do it's thing. A HUGE hit with everyone!
Of course, it led me to thinking of apple pie because I LOVE PIE. Hubby brings me flowers AND PIE as treats:
He had been out of town and this is what he came home with for me!
But you know what goes good with apples y'all???
Red Hot Cinnamon Candies!!!
One of my fave pies as a kid was my mom's red hot cinnamon candy apple pie. Yup. Apple pie that had red hot cinnamon candies in it. So I decided I needed one!
SO so good. And then I was thinking what if I made the applesauce WITH the red hots....
So I went and got some more apples - 3 kinds remember - and cut them up and threw them in my crockpot. I had maybe 7-8 apples. Then I mixed about 1/4 sugar (probably not needed though) and 1/4 tsp. or so of nutmeg - sorry I don't measure anything. I mixed that in to coat the apples and then poured in somewhere between 1/4 and 1/2 cup of red hot candies (Red Dye #40 be damned!)
And we got this:
OH SO GOOD! Especially when you do this:
On top of vanilla ice cream it is dee-LISH!!! I put half in the freezer for later and we have half in the fridge for now.
AND for those that want it - the pie recipe. I have NO idea where this came from originally - I got it from my momma!
Deep Dish Apple Pie
I have mixed success with this pie filling thickening and it frustrates me no end! But either way it sure does taste deeeeeeVINE!
We are finally starting to feel (and look) like fall around here and that means APPLES. Now I realize apples are freely available all year yada yada but fall is supposed to be apple time. I think there are even places around here where we could go and pick our own apples but we have never done that before. Recently my buddy Suzanne posted pics of homemade apple chunky apple sauce and I had to give it a try! WHY I have not done this before is beyond me since I have always loved to cook! So my first go 'round I took 3 kinds of apples (Fuji, Gala, and Golden Delicious) - using several kinds adds depth AND some break down more while others stay chunky so it depends on what you want. And no I do not know which ones break down and which don't but I THINK the Golden Delicious stay the firmest.....Anyway, I cut them up, threw them in a crock pot, sprinkled with cinnamon, apple pie spice and sugar and let the crock pot do it's thing. A HUGE hit with everyone!
Of course, it led me to thinking of apple pie because I LOVE PIE. Hubby brings me flowers AND PIE as treats:
He had been out of town and this is what he came home with for me!
But you know what goes good with apples y'all???
Red Hot Cinnamon Candies!!!
One of my fave pies as a kid was my mom's red hot cinnamon candy apple pie. Yup. Apple pie that had red hot cinnamon candies in it. So I decided I needed one!
SO so good. And then I was thinking what if I made the applesauce WITH the red hots....
So I went and got some more apples - 3 kinds remember - and cut them up and threw them in my crockpot. I had maybe 7-8 apples. Then I mixed about 1/4 sugar (probably not needed though) and 1/4 tsp. or so of nutmeg - sorry I don't measure anything. I mixed that in to coat the apples and then poured in somewhere between 1/4 and 1/2 cup of red hot candies (Red Dye #40 be damned!)
And we got this:
OH SO GOOD! Especially when you do this:
On top of vanilla ice cream it is dee-LISH!!! I put half in the freezer for later and we have half in the fridge for now.
AND for those that want it - the pie recipe. I have NO idea where this came from originally - I got it from my momma!
Deep Dish Apple Pie
- 1/3 c. red hots
- 1/2 c. sugar
- 1/2 c. water
- 6 c. apples
- 1/4 c. flour
- 1/2 c. sugar
- 1/2 tsp. nutmeg
- 1/3 tsp. salt
- 1 tbl. lemon juice
- 2 tbl. butter
- pie crust
I have mixed success with this pie filling thickening and it frustrates me no end! But either way it sure does taste deeeeeeVINE!
Friday, October 4, 2013
I Believe...Cut It Up Challenge
Hi all!
Well, my dreams of blissful, empty, stress free days with Pezza off at school full day are NOT materializing. I envisioned a clean neat house where everything is scrubbed and gleaming, nothing out of place and hours of crafting in the afternoon - NOT happenin'! What's up with that???? I am runnin' all over creation like a chicken with my head cut off, my house looks like a bomb went off, and I haven't had a moment to breathe - not that I could anyway with the allergies I am STILL fighting (and losing against.) On Sunday when I looked at my calendar for this week I thought I was going to cry. Tomorrow I will wake up and bake cupcakes for a school event, get Pezza on the bus, head to my 2 hour allergy appt. to get poked a thousand times, run by the vet to pick up Momma kitty Licorice and her 6 Baby "Bits", head to lunch with some great girls I don't see often enough, drop off aforementioned cupcakes and grab Pezza and a friend off their respective buses to come home and clear my house a bit before hubby comes back in to town. EGADS!
What I really want to do is CREATE! Ah well. I DID sneak into the studio for a bit to create my layout for the wonderful Cut It Up Challenge Blog - the new challenge is up and it's PINK in honor of Breast Cancer Awareness month. I decided to scrap Pezza's first lost tooth. (Yea I am not even pretending to scrap in order anymore!)
I used a sketch from the Sept. 2013 PageMaps Sketches as a starting point (or I'd be here all day re-arranging things!) I got a stack of new papers in June since I had not bought any new paper in YEARS and I pulled these cute ones out of the stack. Then I found this adorable Tooth Fairy cut file set at Treasure Box Design - perfect! While I was working on this layout Pezza lost tooth number 2!
Loaded them into Make the Cut and cut them out using my Black Cat in nothing flat - love it! Pulled out my trusty (and beloved) Tsukineko Dew Drop Inks and inked all the edges up - makes ALL the difference in how good your paper piecings look trust me!
The pink toothpaste has some sparkle to it courtesy of a little Luminarte Primary Elements as does the fairy wings below.
Used a Peachy Keen face stamp for her face - cute and much easier to work with than the tiny eye and nose pieces of paper!
Even had a helper in the studio with me! This is my Tiger - she is an old Maine Coon we have had since birth. She is 14 now and has terrible arthritis and feline breast cancer. She rarely climbs the stairs as it is too difficult for her but today she decided she wanted to see what I was up to. At the moment she is lounging on the front porch refusing to some in for the night - brat! She is the only one allowed outside because she walks about 4 steps out the door and lays down. The others do too much wandering or, in Bubba's case, too much ditzy headed dancing in the road.
Well, my dreams of blissful, empty, stress free days with Pezza off at school full day are NOT materializing. I envisioned a clean neat house where everything is scrubbed and gleaming, nothing out of place and hours of crafting in the afternoon - NOT happenin'! What's up with that???? I am runnin' all over creation like a chicken with my head cut off, my house looks like a bomb went off, and I haven't had a moment to breathe - not that I could anyway with the allergies I am STILL fighting (and losing against.) On Sunday when I looked at my calendar for this week I thought I was going to cry. Tomorrow I will wake up and bake cupcakes for a school event, get Pezza on the bus, head to my 2 hour allergy appt. to get poked a thousand times, run by the vet to pick up Momma kitty Licorice and her 6 Baby "Bits", head to lunch with some great girls I don't see often enough, drop off aforementioned cupcakes and grab Pezza and a friend off their respective buses to come home and clear my house a bit before hubby comes back in to town. EGADS!
What I really want to do is CREATE! Ah well. I DID sneak into the studio for a bit to create my layout for the wonderful Cut It Up Challenge Blog - the new challenge is up and it's PINK in honor of Breast Cancer Awareness month. I decided to scrap Pezza's first lost tooth. (Yea I am not even pretending to scrap in order anymore!)
I used a sketch from the Sept. 2013 PageMaps Sketches as a starting point (or I'd be here all day re-arranging things!) I got a stack of new papers in June since I had not bought any new paper in YEARS and I pulled these cute ones out of the stack. Then I found this adorable Tooth Fairy cut file set at Treasure Box Design - perfect! While I was working on this layout Pezza lost tooth number 2!
Loaded them into Make the Cut and cut them out using my Black Cat in nothing flat - love it! Pulled out my trusty (and beloved) Tsukineko Dew Drop Inks and inked all the edges up - makes ALL the difference in how good your paper piecings look trust me!
The pink toothpaste has some sparkle to it courtesy of a little Luminarte Primary Elements as does the fairy wings below.
Used a Peachy Keen face stamp for her face - cute and much easier to work with than the tiny eye and nose pieces of paper!
Even had a helper in the studio with me! This is my Tiger - she is an old Maine Coon we have had since birth. She is 14 now and has terrible arthritis and feline breast cancer. She rarely climbs the stairs as it is too difficult for her but today she decided she wanted to see what I was up to. At the moment she is lounging on the front porch refusing to some in for the night - brat! She is the only one allowed outside because she walks about 4 steps out the door and lays down. The others do too much wandering or, in Bubba's case, too much ditzy headed dancing in the road.
I hope y'all when join us over on the Cut It Up blog and play in the challenge with us. You can make anything as long as it has pink AND a die cut of some sort. You can win two great prizes: $20 coupon code to As Cute as a Button and a $10.00 Gift Certificate for My Scrap Chick
Now I am setting this to post in the morning and I am off to get some sleep! Have a great weekend everyone!
Monday, September 23, 2013
Digi fun again today - Happy Camers
Hi all!
I have been working unbelievably hard on getting my house cleaned out and organized so I can start re-doing some things...alot of things! Let me tell you about sweeping with a house full of cats. We have hard floors on the main level except in the family room so that's a lot of sweeping. While I am sweeping I have Biscuit chasing the broom, Graham is lying in wait behind and under things and attacking the broom when it gets close enough, meanwhile Bun is chasing the stuff I sweep up and careening through the pile, Fluffy & Tiger are both laying in areas I am trying to sweep and refusing to move no matter how much I nudge with the broom and when I scooped everything into the dust pan and lifted it to put it in the garbage can and Bubba reaches up and grabs it and knocks it all back on the floor. REALLY????
Anyway, on to the crafting. I had told y'all about our last camping trip of the year and you know what I like to work on - my digi album pages. YEP - i got another 2 page spread done.
I chose several of my fave pics that would represent our love of camping and hiking.
And then I paired it up with an ADORABLE kit from Sweet Shoppe - Happy Campers. I think the colors and patterns are so perfect for a camping or outdoorsy layout and the embellishments are just so cute!
I have been working unbelievably hard on getting my house cleaned out and organized so I can start re-doing some things...alot of things! Let me tell you about sweeping with a house full of cats. We have hard floors on the main level except in the family room so that's a lot of sweeping. While I am sweeping I have Biscuit chasing the broom, Graham is lying in wait behind and under things and attacking the broom when it gets close enough, meanwhile Bun is chasing the stuff I sweep up and careening through the pile, Fluffy & Tiger are both laying in areas I am trying to sweep and refusing to move no matter how much I nudge with the broom and when I scooped everything into the dust pan and lifted it to put it in the garbage can and Bubba reaches up and grabs it and knocks it all back on the floor. REALLY????
Anyway, on to the crafting. I had told y'all about our last camping trip of the year and you know what I like to work on - my digi album pages. YEP - i got another 2 page spread done.
I chose several of my fave pics that would represent our love of camping and hiking.
And then I paired it up with an ADORABLE kit from Sweet Shoppe - Happy Campers. I think the colors and patterns are so perfect for a camping or outdoorsy layout and the embellishments are just so cute!
Sunday, September 22, 2013
Around the House - Stuffed Peppers!
Hi all!
Yesterday We headed out to a birthday party here in our neighborhood. The coolest part? It was a Cuban party! Why is this exciting to me? A couple weeks ago I told y'all about meeting a Cuban family at the bus stop - first time I have met any Cubans outside of my own family (and I have barely met any of them!) Well their daughter turned 6 and they threw a party - and let me tell you Cubans LOVE to party! So it was not the traditional sort of birthday party you generally think of - in some ways it was. There were several neighbors but mostly other Cuban families - they have managed to find each other and stick together but they do not all live close. One family came from as far as North Carolina! We had kids running amuck, balloons, brithday cake and a bouncy house. But we also had fantastic Cuban food - Croquettas (hubby's fave) and Ropa Vieja - YUMO! But the best part was getting to hear about other Cubans' experiences and hearing more of Cuba, especially recent Cuba (my family left in 1959 & 1961.) It is an interesting experience to suddenly realize you are not alone. I am looking forward to more parties and also happy that Pezza finally seems to be getting along with Rebecca! They had a bit of a falling out when Rebecca was insisting Pezza HAD to like Barbie's because she is a girl. Pezza DOES NOT like Barbies.....
Now let's get to my post for today! On Sundays I like to do a post outside of the normal crafty stuff. Mostly cooking but I will be adding in other things as I get to them! Today I wanted to share my Stuffed Peppers with you as well as ways to get more done at once to save time later!
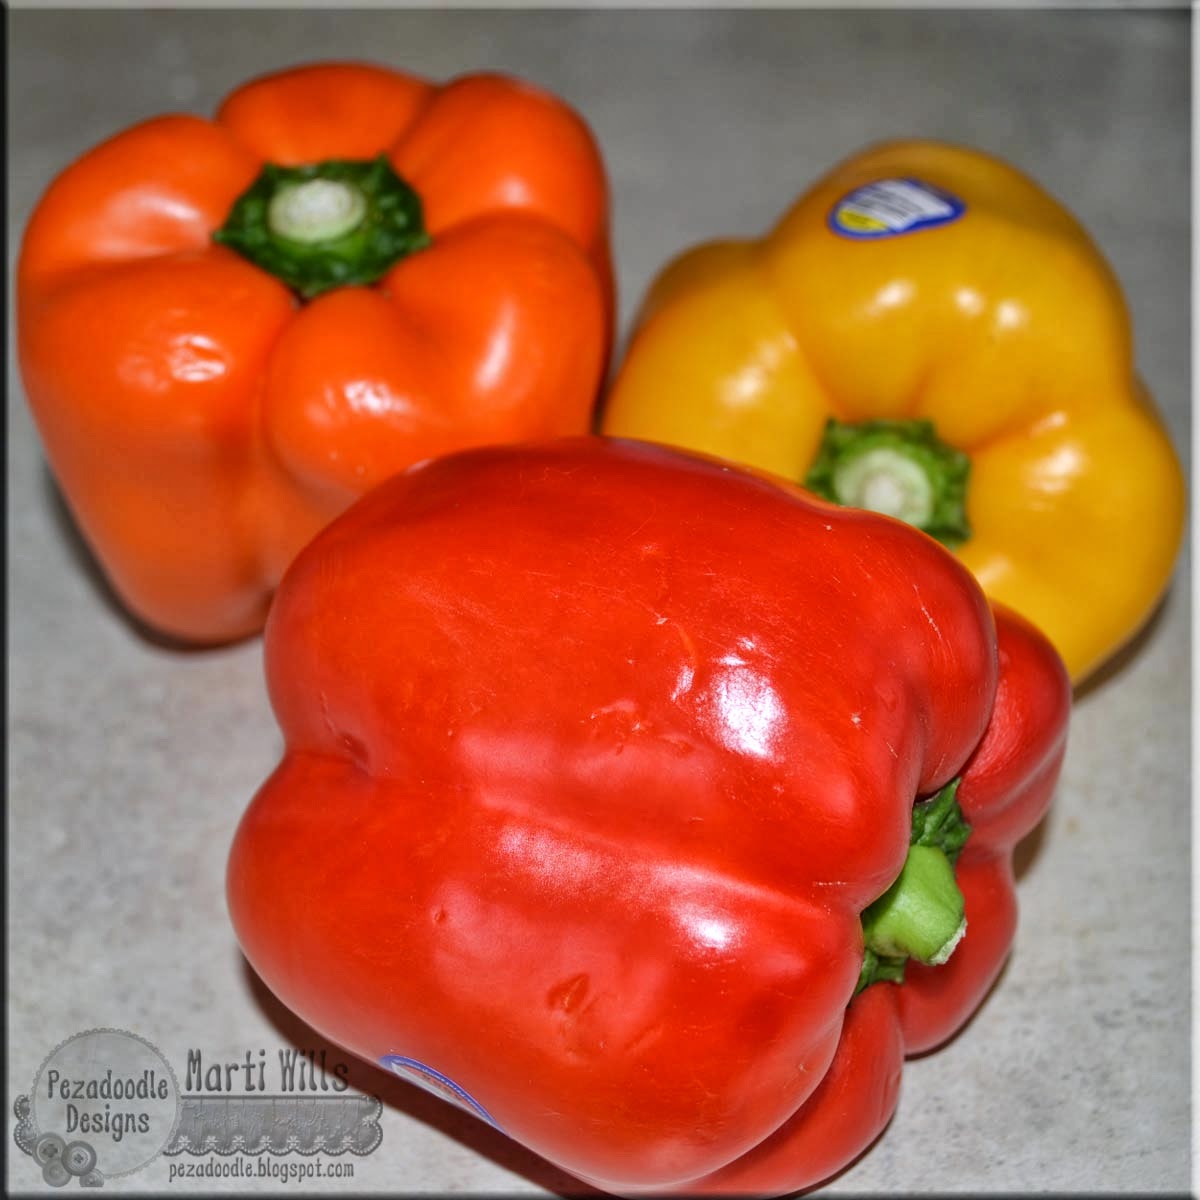
Technically these are my fabulous stepmom's peppers because of one key change - she layers cheese in there! DEE-LISH! I use the colored peppers - Hubby doesn't like the green ones and these are just so darn pretty!
Remember that post a ways back where we chopped up loads of seasoning vegies to freeze and cut prep time while cooking? If you missed it head back and check it out after reading this one! Anyway, we start with those. I melt some real butter with some olive oil - about half and half to cover the bottom of the pan. Throw in several handfulls of the seasoning vegies and saute. We are making some for now and some for later so we need alot! You could also throw in some minced jalapeno or other spicy peppers but I did not have any on hand. Also begin bringing a big pot of salted water to a boil AND get some rice started - I made 3 cups of rice.
Once the vegies are soft remove 1/3 of them and set them aside. Add your ground meat - about 1 1/2 pounds or a little more (though I thawed 3 pounds and you will see why in a minute.) In my case I have half lean ground beef and half ground turkey. You could also add sausage for a different taste. Add your seasonings - I have an Italian Spices grinder I used. Another good one is Emeril's Bam Burgers seasoning mix. Continue cooking until the meat is browned. I "chop" it as I go with my wooden spoon too.
While your meat is browning and once your water is boiling drop your cleaned pepper halves into the boiling water for about 3 minutes and then remove.
Arrange them in your baking dish and layer some cheese in the bottoms. I used 2 layers of Havarti and one of Colby Jack. Pepper Jack would also work really well here. It was at this point that I found myself lamenting at the quality (or lack of) in produce now that I am not in southern California. My peppers are so SMALL!!!
By now your meat should be browned or close to it. Once it is add a can of stewed tomatoes and a can of tomato paste. Mix it in well.
When it is heated through turn off the stove and add your rice - I have about 2 cups in there but adjust it to your families' taste - some may like more rice some more meat.
Now fill those babies up and add a swirl of ketchup to the top. Pop them in the oven at 350 for 20 minutes or so - keep an eye on them because you aren't really COOKING anything, mostly just melting the cheeses and browning the tops a bit. You will only use about half of the mixture to fill the 6 peppers. Which is great news because now you have leftovers to freeze to make life easier on another day and it didn't take any more time and energy to cook a double batch! You can either freeze the filling alone (what I did) or assemble additional Peppers and freeze those. The frozen peppers will make GREAT individual meals for someone to grab or use them all at once to make a second meal for everyone. Make ahead meal #1 done.
Remember the cooked vegies and the other 1 1/2 pounds of ground meat we set aside? Once the vegies are cooled we add the remainder of our UNCOOKED ground meat - the other 1 1/2 pounds I thawed.
We are going to make a meatloaf to freeze right quick! Throw in an egg, some bread crumbs and spices and form into a loaf.
Wrap in foil, place in a freezer ziplock and you have your second easy freezer meal done. All you will need to do is thaw it, mix up a tomato sauce and bake. Throw together some mashed potatoes and a vegie and done! Make ahead meal #2 done!
We also have some leftover rice. That's because we are also going to do an easy rice pudding for dessert! OH how I LOVE me some rice pudding and this one doesn't involve standing over the pot stirring to make your custard. For that I turned to Paula Dean (I know I know she has been is trouble lately and we won't get into that here - the woman CAN COOK.) Get the Recipe.
This rice pudding is baked - much like my bread pudding (which is to DIE FOR.) BUT when you bake a custard type dish you need to set your baking dish inside of another larger dish of water like the pic above. Throw it in the oven - easy peasy!
I did not add the raisins to mine but here it is - let me tell you it disappeared FAST! When I make rice I usually make a 1/3 white to 2/3 brown ratio. It worked perfectly in the pudding.
So there you go - without spending but a TINY amount of extra time in the kitchen you have made dinner and dessert PLUS two additional short cut meals to stash in your freezer (for those days when you realize you have spent way too long in your craft room!) Now I have to get that Ropa Vieja recipe from Lourdes........
Yesterday We headed out to a birthday party here in our neighborhood. The coolest part? It was a Cuban party! Why is this exciting to me? A couple weeks ago I told y'all about meeting a Cuban family at the bus stop - first time I have met any Cubans outside of my own family (and I have barely met any of them!) Well their daughter turned 6 and they threw a party - and let me tell you Cubans LOVE to party! So it was not the traditional sort of birthday party you generally think of - in some ways it was. There were several neighbors but mostly other Cuban families - they have managed to find each other and stick together but they do not all live close. One family came from as far as North Carolina! We had kids running amuck, balloons, brithday cake and a bouncy house. But we also had fantastic Cuban food - Croquettas (hubby's fave) and Ropa Vieja - YUMO! But the best part was getting to hear about other Cubans' experiences and hearing more of Cuba, especially recent Cuba (my family left in 1959 & 1961.) It is an interesting experience to suddenly realize you are not alone. I am looking forward to more parties and also happy that Pezza finally seems to be getting along with Rebecca! They had a bit of a falling out when Rebecca was insisting Pezza HAD to like Barbie's because she is a girl. Pezza DOES NOT like Barbies.....
Now let's get to my post for today! On Sundays I like to do a post outside of the normal crafty stuff. Mostly cooking but I will be adding in other things as I get to them! Today I wanted to share my Stuffed Peppers with you as well as ways to get more done at once to save time later!
Technically these are my fabulous stepmom's peppers because of one key change - she layers cheese in there! DEE-LISH! I use the colored peppers - Hubby doesn't like the green ones and these are just so darn pretty!
Remember that post a ways back where we chopped up loads of seasoning vegies to freeze and cut prep time while cooking? If you missed it head back and check it out after reading this one! Anyway, we start with those. I melt some real butter with some olive oil - about half and half to cover the bottom of the pan. Throw in several handfulls of the seasoning vegies and saute. We are making some for now and some for later so we need alot! You could also throw in some minced jalapeno or other spicy peppers but I did not have any on hand. Also begin bringing a big pot of salted water to a boil AND get some rice started - I made 3 cups of rice.
Once the vegies are soft remove 1/3 of them and set them aside. Add your ground meat - about 1 1/2 pounds or a little more (though I thawed 3 pounds and you will see why in a minute.) In my case I have half lean ground beef and half ground turkey. You could also add sausage for a different taste. Add your seasonings - I have an Italian Spices grinder I used. Another good one is Emeril's Bam Burgers seasoning mix. Continue cooking until the meat is browned. I "chop" it as I go with my wooden spoon too.
While your meat is browning and once your water is boiling drop your cleaned pepper halves into the boiling water for about 3 minutes and then remove.
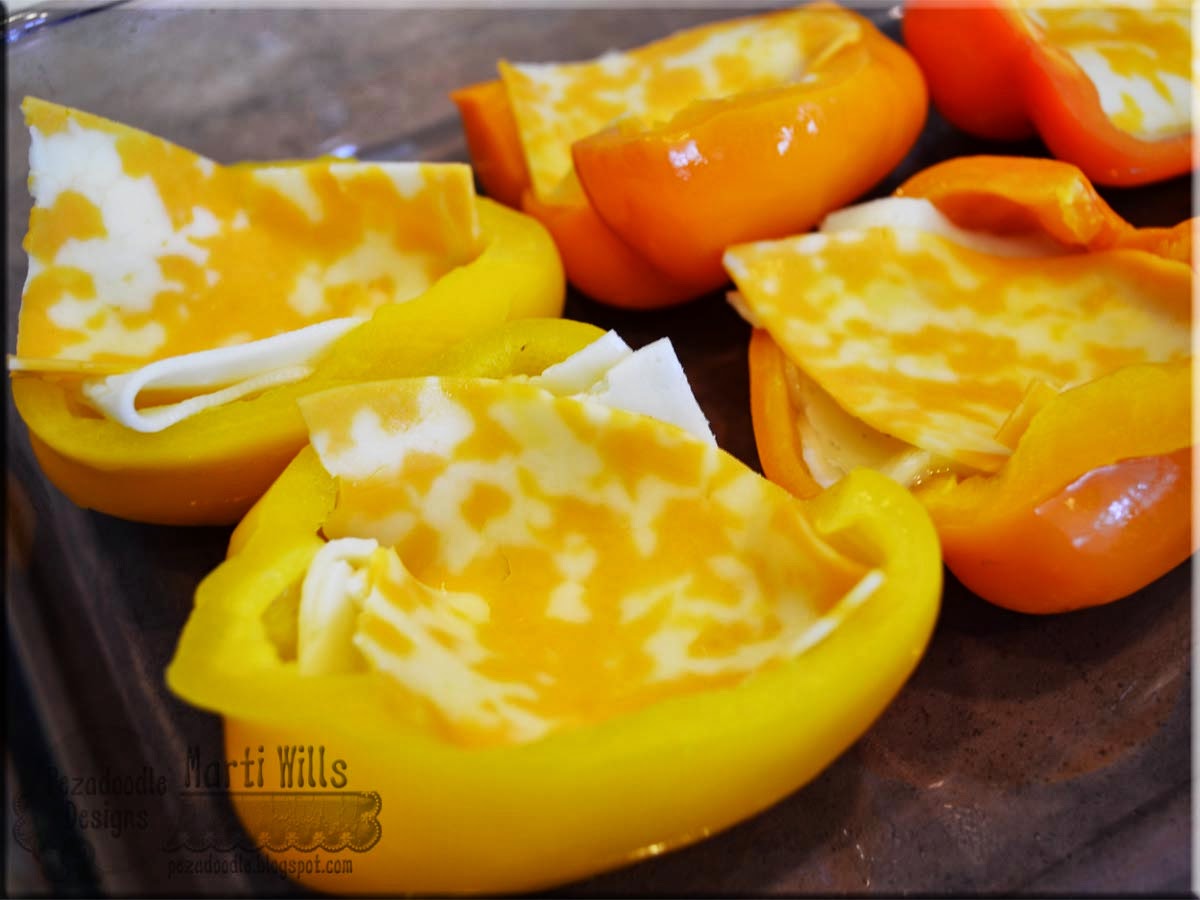
Arrange them in your baking dish and layer some cheese in the bottoms. I used 2 layers of Havarti and one of Colby Jack. Pepper Jack would also work really well here. It was at this point that I found myself lamenting at the quality (or lack of) in produce now that I am not in southern California. My peppers are so SMALL!!!
By now your meat should be browned or close to it. Once it is add a can of stewed tomatoes and a can of tomato paste. Mix it in well.
When it is heated through turn off the stove and add your rice - I have about 2 cups in there but adjust it to your families' taste - some may like more rice some more meat.
Now fill those babies up and add a swirl of ketchup to the top. Pop them in the oven at 350 for 20 minutes or so - keep an eye on them because you aren't really COOKING anything, mostly just melting the cheeses and browning the tops a bit. You will only use about half of the mixture to fill the 6 peppers. Which is great news because now you have leftovers to freeze to make life easier on another day and it didn't take any more time and energy to cook a double batch! You can either freeze the filling alone (what I did) or assemble additional Peppers and freeze those. The frozen peppers will make GREAT individual meals for someone to grab or use them all at once to make a second meal for everyone. Make ahead meal #1 done.
Remember the cooked vegies and the other 1 1/2 pounds of ground meat we set aside? Once the vegies are cooled we add the remainder of our UNCOOKED ground meat - the other 1 1/2 pounds I thawed.
We are going to make a meatloaf to freeze right quick! Throw in an egg, some bread crumbs and spices and form into a loaf.
Wrap in foil, place in a freezer ziplock and you have your second easy freezer meal done. All you will need to do is thaw it, mix up a tomato sauce and bake. Throw together some mashed potatoes and a vegie and done! Make ahead meal #2 done!
We also have some leftover rice. That's because we are also going to do an easy rice pudding for dessert! OH how I LOVE me some rice pudding and this one doesn't involve standing over the pot stirring to make your custard. For that I turned to Paula Dean (I know I know she has been is trouble lately and we won't get into that here - the woman CAN COOK.) Get the Recipe.
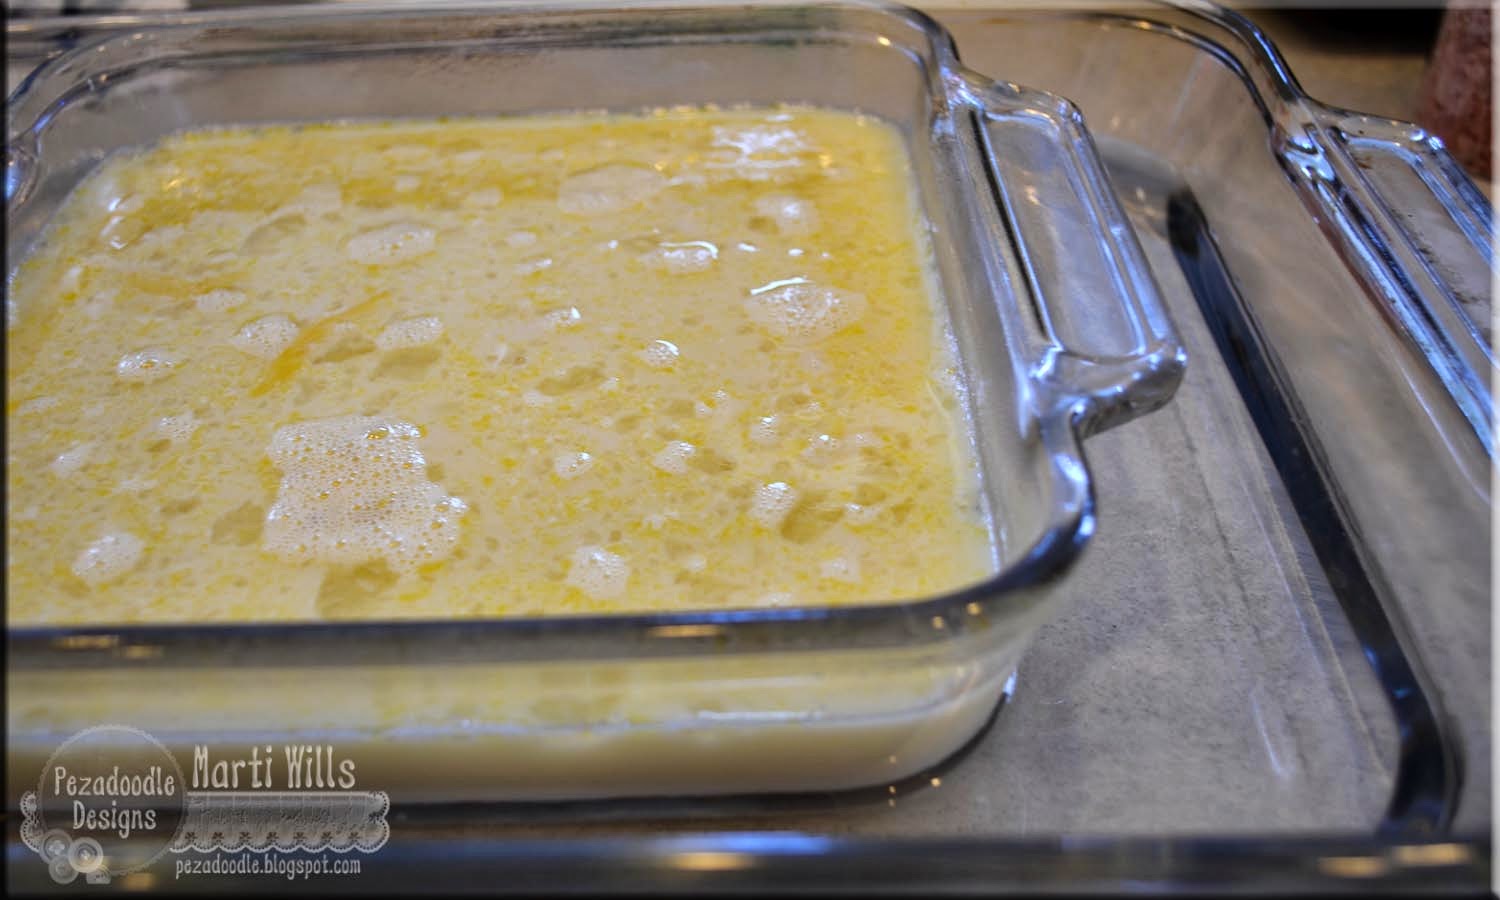
This rice pudding is baked - much like my bread pudding (which is to DIE FOR.) BUT when you bake a custard type dish you need to set your baking dish inside of another larger dish of water like the pic above. Throw it in the oven - easy peasy!
I did not add the raisins to mine but here it is - let me tell you it disappeared FAST! When I make rice I usually make a 1/3 white to 2/3 brown ratio. It worked perfectly in the pudding.
So there you go - without spending but a TINY amount of extra time in the kitchen you have made dinner and dessert PLUS two additional short cut meals to stash in your freezer (for those days when you realize you have spent way too long in your craft room!) Now I have to get that Ropa Vieja recipe from Lourdes........
Subscribe to:
Posts (Atom)