Thursday, July 31, 2008

showin some mojo love for my stampscapes!

oh how i love when i get time to do sketch challenges! this one is this weeks Mojo Monday Sketch from Julee:

i left off the top strip because it didn't add to my design but i want to make another one now - if only i had time.....i also did this one using Tuesday's color challenge over on SCS - sahara sand, groovy guava and white. so on to my card:


This one was SUCH fun to do. i used a new stampscapes stamp, new versamagic dew drop ink pads i just stocked on my website AND my new cuttlebug folders!!

the background piece is run through the cuttlebug and then i ran a versamagic dew drop over it in sage to highlight the embossing. these are chalk inks which i have never used so i don't kow what others are like but these are DEEEElish!! coverage is vary opaque and creamy and they blend SO WELL!!!!!!!!!!!!!! (i will get them up for ordering this weekend i hope!!) i cut the 2 circles with George and the scallop with celebrations on my cricut. then i ran the white circle through the cuttlebug with one of the decorative circle embossing folders. this one was highlighted with versamagic pink grapefruit and the foam blending tool - perfect for highlighting embossing.

the stamp is autumn brook. i inked it with various colors of versamagic (dew drops are perfect for this sort of precision inking) and then stamped it on white cardstock. many people get very fancy with their coloring of stampscapes but this shows it can be simple too! i mounted it on sahara sand and embossed the edge with one of the new embossing borders. again i inked it with the foam blending tool. the piercing across the top was done with the tim holtz ruler so i get perfectly spaced dots.

i will definitely be playing with these versamagics more!!!
PS - remember our UTEE tutorial with the cracked glass? you have GOT to run over and see what catherine has done with it on her blog!!!!

Wednesday, July 30, 2008

UTEE tutorial - part 2

Here is the next UTEE tip from the LO i posted yesterday - this will explain how to do the pearlized embellishments:


I love this technique because they aren't just all shimmery but also sort of "poofy"


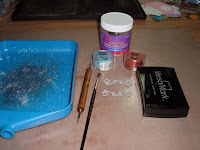
Supplies: grungeboard or chipboard pieces, versamark, UTEE, small brush, perfect pearls, small stylus or tweezers to hold the piece while heating. Smoosh your grungeboard piece into versamark until it is coated really well. Place it in the bead tray and cover with UTEE. gently dump off the excess.


Use the stylus or tweezers to hold the piece still and begin heating - start with your gun high above and slowly move it down as it begins to melt, once it melts you can get closer. Aim your gun away and sprinkle on more UTEE into the soft UTEE until you get a good solid coverage. Let it cool slighty - this is a bit of trial and error - and then brush on the perfect pearls. it will stick to the UTEE. once it is covered heat it just a little bit so the perfect pearls sticks-you will see a slight change. sometimes i add another layer of perfect pearls so it is good and shimmery!

have you seen the new grungeboard coming out???? i am SO excited about it! nature shapes and holiday shapes PLUS grunge BOOKS!!! you can preorder on my website.

happy stampy hugs!!

Tuesday, July 29, 2008

UTEE tutorial - part 1 (and new cuttlebug folders)

i have been seeing lots of questions about UTEE so i am going to do a few tutorials with it up next. i am by no means an expert and i know this incredibly versatile product can do ALOT of things but i am going to give you a few of my basic faves. my examples are all on a LO - YAY got a LO done!! frist the sketch i used:

This is an 8 1/2 x 11 sketch but i did it 12x12. sometimes ny finished product looks just like the sketch and sometimes it ends up so different i don't even post the sketch but in this case i did not stray far...


Can YOU find the UTEE in this LO?? HAHAHA just kidding - i have a total of 6 items, 3 techniques here and i will do a lesson on each one.


First page:


Second page:


lesson for today - sample#1


Lesson for today - sample#2


did you see the new Cuttlebug embossing folder borders!!! if you haven't gotten any RUN over to Crop Stop and check them out!!!
tell haily jo i sent you!!!
smudged up the embossing with versamagic (luscious stuff! more on that thursday) and the foam blender tool.

This technique is called cracked glass and i in no way came up with it :)

supplies: UTEE (Ultra Thick Embossing Enamel) in clear, versamark pad, heat gun, glitter tray, stamped/colored images or die cuts on cardstock.

Smoosh your image into your versamark pad - really smoosh it in there and get a good coating of versamark all over the front - you can tell in the light because it looks wet and shiny.


Now pour some UTEE over it and then very gently dump the loose extra cystals off. set the image in your glitter tray. **DISCLAIMER** very meesy, especially the first few times you do this. before using UTEE i usually make sure my area is cleaned up. it will also get all over your tray so you need to have a sort of s=designated UTEE tray!


the large crstals don't actually STICK as well to the versamark like regular embossing powder. when eating you don't want to start out very close or the gun will blow the crystals everywhere. and i do mena everywhere! so i start very high up and slowly move closer - if i see any crystals start to move around i back up a bit. as it gets warm and starts to melt you can move in closer.


in this pic you can see it has started to melt. at first it beads up and then it smoothes out. this process takes longer than regular EP.


You want a thick, smooth, even coating so while the UTEE is still hot aim the gun away and sprinkle more UTEE, heat it, repeat over all areas until you feel it is a nice thick coverage. next put your image in the freezer for at least 10 minutes.


Take the image(s) out of the freezer one at a time and quickly, gently bend them in different directions to crack the UTEE - not too hard or it might pop off.


next you can use a foam blender and smudge it over with a dark ink like vintage photo to get the cracks more noticeable. wipe excess ink off surface.

i plan to have the next two tutorials post wednesday and friday (yes skipping ANOTHER TOTB Friday) as i will be out of town at the Creating Keepsakes Convention in Vally Forge PA - anyone else going to be there??? if so leave me a comment! i look ofrward to some cool classes and lots of shopping as well as some full nights of sleep, room service, no dishes and time to add a slew of new products to the website!!!! baby and daddy will be on their own for the first time ever!! don't worry the boys have strict instructions to help entertain her and the neighbor is on call for emergencies!


Sunday, July 27, 2008

all that shimmers...OCCC and then some...

The layout of these might look familiar - it is a sketch by Jen i found in a mag (Stampers Sampler Take Ten) and i just LOVE LOVE LOVE it! i posted a couple last week and here are a few more. I have been playing with some of the new inkadinkado stamps that came in (more will be in very soon) and the shimmery brilliance and encore metallic inks.

The challenge over on OCC today was holiday cards so i have several here :)
The picture doesn't do this one justice - i used silver, denim and stonewashed alcohol ink on glossy paper and then ran it thru the Cuttlebug (my new folders shipped saturday *waving to Hailey Jo over at Crop Stop!*)


The stamps are from on eof the new Inkadinkado sets that just came in to my website - Holiday Wishes. i used blue and silver encore metallic inks.


The border is accented with blue Swirley Pops and i used silver ice stickles - another new item in the store.


I did the double cuttlebug technique here (run it thru the cuttlebug, ink VERY lightly - the small pads work better for me), once dry flatten with your bone folder, repeat with second folder. This gorgeous bird stamp is from the Halloween Trails Inkadinkado set. i stamped it with copper encore ink and colored the moon yellow with a copic marker.


Accents are bead pops and tiny mosaic glass squares. The little cats are black felt with some sparkle, dots are copper stickles.


Next up is a New Years card:

The background is alcohol ink on glossy paper (red pepper, pitch black and gold mixative.) The black panel is doodlebug velvet paper from Paper Patch Crafts.

The stamps are studio Gs. the gold ones are stamped with gold encore ink and the red is stamped in versamark and brushed with forever red perfect pearls. i filled in the champagne in the glasses with a clear sakura glitter pen.


The corners each have a Hot Tamale Jewel Pop (JUST got my new ones in from catherine - oh so yummy - she is the BEST!) Stickle accents are the neW Glitz Designer stickles - i used Champagne and Ruby Slippers - they are available on my website. I also used the Champagne stickles to fill in the punched border.


Next up is my favorite - i used the alcohol ink over tin foil technique using meadow, lettuce and gold alcohol inks and ran it thru the cuttlebug.


the large stamp is from the Winter Trails Inkadinkado Set. I "inked" it with the Essential Glue pad and then covered it in green and gold Martha Stewart Ultra Fine Glitter. the sentiment is a studio G done the same way. i was really impressed with the glue pad and like how these turned out.


The accent dots are Lettuce Dimensional Pearls and the three bead pops are oscar gold swirly pops.

and there is my christmas (and Halloween) in July! I have UTEE tutorials scheduled to start tomorrow but i am a litlte uncertain whether i will get to them in time - i am leaving Friday for the Creating Keepsakes Convention in Valley Forge. SO looking forward to a weekend devoted to me!!!! looking forward to learning some great new stuff in classes and doing some shopping!!

anyone else going to be there???

Glitz stickles are HERE!!!!!...aaaaand they're gone......

Have you ordered yours yet????? my first shipment arrived yesterday and i was sold out in 4 hours. luckily i have a second shipment and i really hope it comes in next week!!! These are so gorgeous in real life - not your same old stickles!!

Champagne - gold glitter with a little bit of iridescent glitter mixed in
Ruby Slippers - mostly red glitter with pink mixed in
Sequins - appears mostly magents with gold, blue, red & aqua mixed in
Mermaid - aqua glitter with a little green & magenta mixed in
Grape - purple glitter with blue & copper mixed in
Tiara - mostly silver with a good bit of copper mixed in
i don't know how well my pics or expanantions are BUT i ADORE them - stickles but nothing like what we already have!

and on that note todays post will be all business - SORRY!!! i will go by vendor and give you all some updates:

Ranger:
Glitz stickles are already shipping - next order should arrive in a week or so
i have many other new CHA items up for you to pre-order or just check out - distress stickles, white distress crackle paint, 3 metallic distress crackle paints, new grungeboard shapes, grungeboard books - all of these are expected in September.
i also now have the mini misters selling individually instead of packs of three and they are all white which i love so i can tell what color is in them :) this change will appear later today on the website as well.

Studio G:
i am STILL waiting on a shipment - i have inks - warmth collection, wooden alphas series 1 for those who already ordered and FINALLY some more series 16 - so if you have been waiting i am SO sorry for such a long delay.

i am still taking pre-orders for the following:
series 20-halloween
series 22-christmas
series 25-months
ink-halloween
ink-christmas
glitter glue-halloween

i have had questions about wood alpha series 2 and someone has spotted wood alpha series 3 in Michaels. i will try and find out more info on these monday

Inkadinkado:
most of the new halloween/fall/holiday clear stamp sets i just got in have sold out - i DO have more on the way but no ship date - if you have ordered and not received a shipping notice don't worry - they are coming!!!

Tsukineko:
i just re-stocked the Memento dew drops, versamark pads
brilliance dew drops are on their way
new additions - i hope to get these up on the website today -full size memento pads in tuxedo black, rich cocoa, and london fog, small size encore metallic inks - look for a sample to post later today - another fab line of inks just perfect for the holidays - look for these to go up later today.
also new - essential glue pad and full line of versamagic dew drops - i have not had time to play with these yet but the colors sure look YUMMY!!!

CHA release
versamark DAZZLE in frost and champagne - should be here in 6-8 weeks = pre-orders will go up on the website
a SPRAY TOP for your staz on cleaner - hooray!!!


ok that covers it for now. look for another post later (i hope) with some cards for the OCC challenge


Saturday, July 26, 2008

2sketches 4 you TCP tuesday

i have a double challenge today! the sketch is from 2 sketches 4 you - a new sketch site for me that i hope to play more often. the colors are the TCP Tuesday challenge - a card suing brown, pink and orange:

The stamps is The Cat's Pajamas and the sentiment is one of the studio G series 16. patterned paper is from DCWV Nana's Nursery - i ADORE it!


Ink is mementos dew drops and i colored with copics. the flower centers are mini sugar pops coming soon!

Next up is just a cute LO i did with a new set from MFT:


All coloring is copics. It is so hard to see but the sheep are the coolest - have you tried the Doodlebug Crushed Velvet Flock?????? OH WOW is all i can say! i soread on some glossy accents, sprinkled on the crushed velvet and patted it down a bit. It is oh so fuzzy AND DOES NOT RUB OFF!!! even the 1 year old didn't rub it off!! i got mine in little trial sizes of a few colors to try them out over at Paper Patch Crafts.

Happy Stampin'


Thursday, July 24, 2008

i{heart} and SCS sketch challenge cards to share

No tutorials just some fun stuff! these all use some of the new Inkadinkado clear stamp sets i just got in stock. the first two are for Jen's sketch:


And the cards:


i also used the brilliance pearlescent dew drops which are perfect for these syamps since they are mostly solid images. the skulls are grungeboard colored with brilliance moonlight white - covers very well!


Next up i used the sketch over on SCS:


how stinkin' cute are those cupcakes???? the whole set is adorable!! go check out all the new sets i have up in the store - ready to ship!!