Showing posts with label OCCC. Show all posts

Tuesday, March 10, 2009

Hooray for spring! SC218 AND OCCC doodling...

i have a twofer today yay!

We had GORGEOUS weather here in Northern VA for the last 4 days and this card is JUST how i have felt - all bright and happy and excited for some great outdoors!


my image is colored with copics and has some extra bling from spicas and crystal stickles (oh how i love the little inch worm-y). the green doodles edges are also spica and the white doodles on the patterned paper is my inkssentials white gel pen. the paper itself is gorgeous bo bunny paper from the ella collection and *might* appear soon in a little mini kit of goodies for spring :) i added extra bling to paper strips with the crystal stickles and doodled the edges of the borders too - done with one of the new ek success slim punches - best punches i have EVER used! you can punch thru cardstock with your fingertips instead of full body weight!!

Are you a Studio G *collector*?? want to become a Studio G USER instead???? be sure to tune in tomorrow to see my sample for the latest challenge in the papercraft planet studio G group - with a PRIZE from hampton arts!!!! Check the group for other samples submitted so far.

have a stampy day!


Thursday, February 26, 2009

OCCC and SFYTT and still NO COLORING...

ok raise your hand if you are tired of seeing this flower stamp and purple and green *raises hand* - i was on a role this weekend and i love all the things i made but by the time i was through i was tired of seeing the same stamp and color combo (even tho it is my favorite color combo) BUT when your on a roll you go with it right? so here are my next two fun things~~

the challenge on Our Creative Corner was to use tags so both of these cards have grungeboard tags on them. Jen's SFYTT is the second one...

This first one is actually tag 2 from tim holtz's 12 tags of christmas 2008:

This card was quick and easy and uses a couple of the NEWEST colors in the alcohol ink line - purple twilight and cool peri - i cannot WAIT to get my hands on the rest of the colors - which should be here within the next week!! these open up SO many new possibilities and just in time for spring and summer (the original earthtone colors tend to make me think of fall and winter.) for the card above i used eggplant, purple twilight, cool peri and silver mixative on ranger's glossy cardstock to make the background piece. next i stamped my image using versamark and then embossed with black embossing powder. next i stamped the swirly image using black archival ink (which is cool because it fades out a bit where it is over silver.) next i added a few swirley white basic grey rub ons and the silver bird charm (from my friend Susana's Store). i inked the grungeboard tag with milled lavender, stamped my studio g image and used two glittery bead pops (thanks cat) as decorative pieces instead of brads. the black dots are just drops of espresso dimensional pearls (if you find you get *peeks* when using dimensional or liquid pearls just tap the underside gently a few times and they will disappear.)


i cannot stress enough how fabulous these tutorials of tim's are. if you have ever wanted to learn how to use all the cool products Ranger Ink has to offer his tutorials will show you ALL you need to know and are so clear and easy to follow!!!


next up i have more tim stuff. for this one i used Jen's Sketch For You To Try this week ->


and came up with this:
i stamped the image with versamark and then carefully sprinkled distress embossing powders on the different parts of the image to *color* it without coloring :) is that cheating??? for this one i used 5 embossing powders - mustard seed, milled lavender, dusty concord, shabby shutters and peeled paint. i just shake the jars well and take a little pinch at a time, hold it over the area i want colored and slowly move my thumb and finger just a tiny bit so i can control the powders. once they are all down i tap the underside a bit so the powders dance around and cover their areas well. dump off the excess and heat. these powders are different than your regular slick and glossy embossing powders. these have a flat sort of sandpaper distress look which is so cool. the edges are done with an ink blending foam tool and distress inks - first dusty concord and peeled paint and then barely edged with walnut stain. the grungeboard tag frame is painted with dusty concord crackle paint.

All of these items (including the new alcohol ink colors) are on sale right now but hurry! the sale will be ending very soon!!!!!! and then it is back to regular price.

i hope you are all having fun exploring some non-coloring options with me!


Saturday, January 10, 2009

couple sketches for ya - studio G and SHIMMERZ - yummo!


hi! i am so behind on my sketch challenges so i am posting a two in one for ya today! the first card uses Jen's sketch from last week ->


AND incorporates a new challenge i stumbled across that i just LOVE (tho i find it VERY challenging)! Ashley over on heart hugs designs does an etsy inspired challenge. now this is cool! features a new etsy artist each time and then you browse the site and base your project on something there. the one posted last saturday featured the artwork of autumn russell - she draws fashion type stuff which is totally hot right now AND her work is FABBY BUT not really my thing.....so i had no idea what i was going to use....


and then i realized why i love studio Gs so much!! there's nothing i don't have!! so i pulled down my binder, flipped through and sure enough it came to me! there were some incredible pics of high heel shoes and i remembered seeing some in the studio Gs (and thinking how i would NEVER EVER use them) so i found an assortment and picked out two shoe stamps, a purse and a sentiment and here is what i ended up with:


i think it is kinda cute even! i stamped in poppy, then orchid, then lightening black brilliance inks on each panel. Placed a prima for the embellishment and added a few bead pops from the cupid mix.

next up is the sketch from OCCC last saturday (hey i told you i was a bit behind....) ->

i decided to ink up another FABBY stamp - fairy with rose - from my friend susana's shop:

as soon as i saw it i knew i wanted to do faux watercolor with it and i love the result! i inked up the stamp with memento dew drops - the little dew drops are perfectly sized and shaped for precision inking in a hurry. once it was all inked i held it at arms length and misted lightly with water, then stamped onto watercolor paper.

i painted her dress and winges with opal SHIMMERZ from susana's shop - i tried to capture it in this photo.....

IRL it is awesome and shimmery in just the right spots.

i finished it off with some little clay flowers i made to match.

well i am back to work on some things i am planning.......

have a stampy weekend!!


Wednesday, October 8, 2008

cupcakes, bling and a good idea....(SFYTT & OCCC)

hi all!!! todays card combines two challenges - SFYTT -->
and OCCC - use some bling. my friend Suzanne *waving* was s o sweet to give me some images to color so today i have a tilda holding a little cupcake:


I think she turned out cutie patootie! i tried some experiments with shimmering mists over the weekends (will be reporting back on others as they are used) but on this particular one i made shimmery mist simply using brilliance pearlescent orchid reinker and encore metallic teal reinker and water in a mini mister. the colors are very good and the shimmer is wonderful! tilda is colored with copics. i added frosted lace stickles to the patterned paper as well as painting some pearl perfect pearls on in spots with an aquapainter - also did this for her wings. finished off with some liquid pearls dotted around the edges. LOVE LOVE those liquid pearls!!

one last tip for you from my experiments - dimensional pearls and water DOES NOT work for making shimmering mist!!!

be sure and check in tomorrow for an exciting announcement (it's from studio G.....) and don't forget i have big & juicy rainbow ink pads on sale!!!

Thursday, August 14, 2008

skitterbugs minus the skittles for OCC challenge

So I have been doing my best to keep up with the challenges on my friend Amy's blog she does with a very talented group of girls - Our Creative Corner. The challenge is posted on Saturdays and the last one was a limited supplies challenge - NO designer/patterned paper and FOUR layers or LESS. So here is a 3 card set i came up with using some as yet uninked stamps from My Favorite Things. In addition they each have one of my newly released skitterbugs stamps.


Now i DO LOVE them with the altered skittles for their little bodies (see pic at right) but i wanted to show everyone they can be just as cutie patootie on their own!


So here are my 3 cards:

Colored with copics. New cuttlebug folder along the bottom and then inked with a versamagic dew drop (also available on my website). stickles in the center of course. The strip across the center is velvet paper. shape is the new storybook cricut cartridge, dots are liquid pearls and then each corner has a kaiser stick on pearl. little bee skitterbug.

another new CB folder and lots of the new glitz stickles - ruby slippers, colored with copics, red is another velvet paper. scallopped oval is cut with nestabilities. Little ladybug skitterbug.

finally, top and bottom are velvet paper embossed with CB borders. stickles dots and a little snail skitterbug.

for an update - my altered beads for these are completely sold out :( but no worries!! order away and they will be shipped straight from sugar n scraps in canada. i still have stamps left but they are going fast! in addition i have three more in production that i am sure you will love including one for halloween!

don't forget to sign in for blog candy on yesterday's post!!!

now off to work i go - meaning holy mess batman - my kitchen looks like an explosion!!!!!!!

Sunday, July 27, 2008

all that shimmers...OCCC and then some...

The layout of these might look familiar - it is a sketch by Jen i found in a mag (Stampers Sampler Take Ten) and i just LOVE LOVE LOVE it! i posted a couple last week and here are a few more. I have been playing with some of the new inkadinkado stamps that came in (more will be in very soon) and the shimmery brilliance and encore metallic inks.

The challenge over on OCC today was holiday cards so i have several here :)
The picture doesn't do this one justice - i used silver, denim and stonewashed alcohol ink on glossy paper and then ran it thru the Cuttlebug (my new folders shipped saturday *waving to Hailey Jo over at Crop Stop!*)


The stamps are from on eof the new Inkadinkado sets that just came in to my website - Holiday Wishes. i used blue and silver encore metallic inks.


The border is accented with blue Swirley Pops and i used silver ice stickles - another new item in the store.


I did the double cuttlebug technique here (run it thru the cuttlebug, ink VERY lightly - the small pads work better for me), once dry flatten with your bone folder, repeat with second folder. This gorgeous bird stamp is from the Halloween Trails Inkadinkado set. i stamped it with copper encore ink and colored the moon yellow with a copic marker.


Accents are bead pops and tiny mosaic glass squares. The little cats are black felt with some sparkle, dots are copper stickles.


Next up is a New Years card:

The background is alcohol ink on glossy paper (red pepper, pitch black and gold mixative.) The black panel is doodlebug velvet paper from Paper Patch Crafts.

The stamps are studio Gs. the gold ones are stamped with gold encore ink and the red is stamped in versamark and brushed with forever red perfect pearls. i filled in the champagne in the glasses with a clear sakura glitter pen.


The corners each have a Hot Tamale Jewel Pop (JUST got my new ones in from catherine - oh so yummy - she is the BEST!) Stickle accents are the neW Glitz Designer stickles - i used Champagne and Ruby Slippers - they are available on my website. I also used the Champagne stickles to fill in the punched border.


Next up is my favorite - i used the alcohol ink over tin foil technique using meadow, lettuce and gold alcohol inks and ran it thru the cuttlebug.


the large stamp is from the Winter Trails Inkadinkado Set. I "inked" it with the Essential Glue pad and then covered it in green and gold Martha Stewart Ultra Fine Glitter. the sentiment is a studio G done the same way. i was really impressed with the glue pad and like how these turned out.


The accent dots are Lettuce Dimensional Pearls and the three bead pops are oscar gold swirly pops.

and there is my christmas (and Halloween) in July! I have UTEE tutorials scheduled to start tomorrow but i am a litlte uncertain whether i will get to them in time - i am leaving Friday for the Creating Keepsakes Convention in Valley Forge. SO looking forward to a weekend devoted to me!!!! looking forward to learning some great new stuff in classes and doing some shopping!!

anyone else going to be there???

Sunday, June 15, 2008

Tutorial - embossing and NEW sketches to play!!!!!

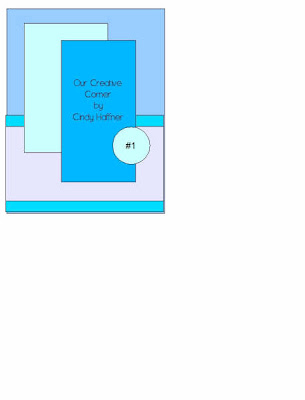
HOORAY!! there is a new sketch blog up and running - i know...i have a hard enought ime keeping up with the ones i already love, but a friend of mine who's work i ADORE is one of the girls doing it **waving to Amy - go girl!** So here is the first sketch:And my card - a father's day card for my dad - yes i just made it - somehow i thought father's day was next weekend EEEEEK!!!!! oh well he is late for everything anyway so it's all good. I turned the sketch on it's side and changed where i put my little embellishment to fit my image.

I have had a great many requests for tutorials on the ranger and other products i sell in the store so i have finally given in and today will be the first installment. i will focus on one product family each week and post tutorials using it in a variety of ways since the products can be SO versatile. This week we will look at embossing techniques with different types of embossing powders. Today is the basics using clear embossing powders. The card above has two techniques with the clear detail embossing powder.

First your basic tools:


(OK minus all the junk in the background) - you need Versamark, colored embossing or pigment inks - Rangers distress inks work well and their new adirondack pigment inks and the brilliance dew drop pigment inks all work very well. Clear embossing powder - i use Ranger powders because i find them to be superior to stampendous. SU powders are also good but i have only used clear and rainbow ice. I have not tried others..... a heat gun, i have had the one above for years and years. i'd like to replace it with the one from ranger BUT it has not been in stock for months on end.....I also highly recommend getting the little tray above as it is just much more convenient and helps save the excess powder sort of like when you glitter something and shake off the excess. Also an embossing buddy - mine is from SU, i think they have some at Michaels - this eliminates static cling and oils, etc that may make some powder stick where you don't want it.

for the first image, Dancing with Pezzy, I want embossed black outlines so after swiping the embossing buddy across the cardstock I will ink up using rangers pitch black pigment ink and stmp onto my paper. pour clear embossing powder over the image - you don't need to rush so that you make yourself nervous as the ink will stay wet for several minutes. gently shake off the excess, lightly tap the back if necessary but not too hard or you could kock off the powder you want too.

In the picture above i tried to show you the unmelted powder - you can see the graininess before you heat it. i ALWAYS heat under an ott light so i can see the change in the powder take place as it melts. if you overheat the powder will melt into the paper and disappear or you could burn your paper. For most powders you will SEE the difference under a good light as the grains melt into each other and become shiny.

Here is the image completed. notice how shiny black the lines are and they have a raised surface from the paper.

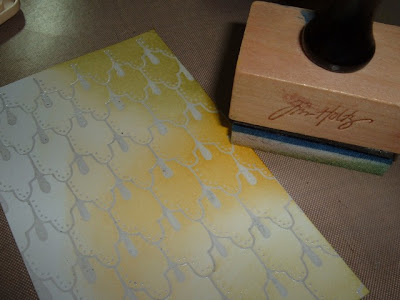
Next we will do our background piece using Drop Scallops. Embossing powder acts as a resist. I swipe the cardstock with the embossing buddy. Ink up the background stamp with the versamark. Versamark is a colorless, versatile sticky ink. Stamp onto your cardstock and then cover in clear embossing powder. Heat until melted and shiny:


Next i want to color my background to make my design pop out. I ADORE the ranger foam ink blending tool. I wanted to do something in yellows and greens to match Pezzy so i picked out a couple inks to start with:

I ink up one short side of the foam with one color. The trick to getting a gorgeous, soft covering of color is to keep the tool in motion - i work over a non-stick craft sheet and touch the foam lightly to the sheet and start moving it in a circular motion and then move onto the paper. this also makes the edges automatically darker (works FAB for cricut cut detailing too).
i ended up adding two other colors to get just the look i wanted. once the piece is covered in ink i lightly wipe it with a paper towel to "shine up" the embossed image and get any ink off of it.

Below are two images stamped with colored pigment ink and then clear embossed to show the difference. The top two are embossed and the bottom two are not.

I will cover other powders and techniques throughout the week including the fantastic distress embossing powders so stay tuned!!! Have fun!