Monday, September 23, 2013

Digi fun again today - Happy Camers

Hi all!

I have been working unbelievably hard on getting my house cleaned out and organized so I can start re-doing some things...alot of things!  Let me tell you about sweeping with a house full of cats.  We have hard floors on the main level except in the family room so that's a lot of sweeping.  While I am sweeping I have Biscuit chasing the broom, Graham is lying in wait behind and under things and attacking the broom when it gets close enough, meanwhile Bun is chasing the stuff I sweep up and careening through the pile,  Fluffy & Tiger are both laying in areas I am trying to sweep and refusing to move no matter how much I nudge with the broom and when I scooped everything into the dust pan and lifted it to put it in the garbage can and Bubba reaches up and grabs it and knocks it all back on the floor.  REALLY????

Anyway, on to the crafting.  I had told y'all about our last camping trip of the year and you know what I like to work on - my digi album pages.  YEP - i got another 2 page spread done.


I chose several of my fave pics that would represent our love of camping and hiking.


And then I paired it up with an ADORABLE kit from Sweet Shoppe - Happy Campers.  I think the colors and patterns are so perfect for a camping or outdoorsy layout and the embellishments are just so cute!

Sunday, September 22, 2013

Around the House - Stuffed Peppers!

Hi all!

Yesterday We headed out to a birthday party here in our neighborhood.  The coolest part?  It was a Cuban party!  Why is this exciting to me?  A couple weeks ago I told y'all about meeting a Cuban family at the bus stop - first time I have met any Cubans outside of my own family (and I have barely met any of them!)  Well their daughter turned 6 and they threw a party - and let me tell you Cubans LOVE to party!  So it was not the traditional sort of birthday party you generally think of - in some ways it was.  There were several neighbors but mostly other Cuban families - they have managed to find each other and stick together but they do not all live close.  One family came from as far as North Carolina!  We had kids running amuck, balloons, brithday cake and a bouncy house.  But we also had fantastic Cuban food - Croquettas (hubby's fave) and Ropa Vieja - YUMO!  But the best part was getting to hear about other Cubans' experiences and hearing more of Cuba, especially recent Cuba (my family left in 1959 & 1961.)  It is an interesting experience to suddenly realize you are not alone.  I am looking forward to more parties and also happy that Pezza finally seems to be getting along with Rebecca!  They had a bit of a falling out when Rebecca was insisting Pezza HAD to like Barbie's because she is a girl.  Pezza DOES NOT like Barbies.....

Now let's get to my post for today!  On Sundays I like to do a post outside of the normal crafty stuff.  Mostly cooking but I will be adding in other things as I get to them!  Today I wanted to share my Stuffed Peppers with you as well as ways to get more done at once to save time later!


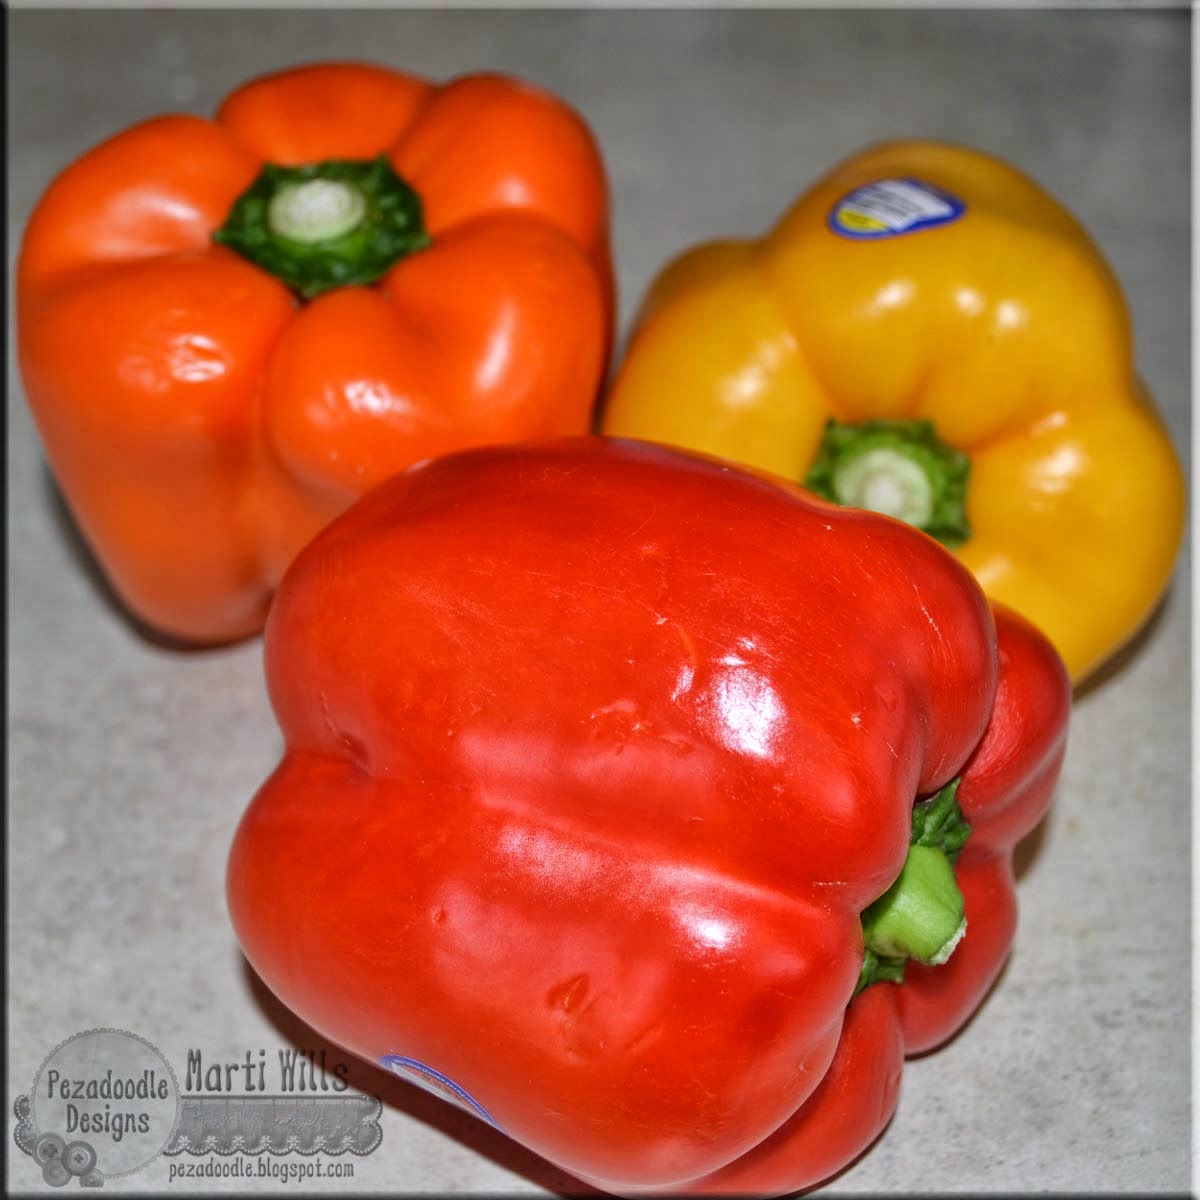
Technically these are my fabulous stepmom's peppers because of one key change - she layers cheese in there!  DEE-LISH!  I use the colored peppers - Hubby doesn't like the green ones and these are just so darn pretty!

Remember that post a ways back where we chopped up loads of seasoning vegies to freeze and cut prep time while cooking?  If you missed it head back and check it out after reading this one!  Anyway, we start with those.  I melt some real butter with some olive oil - about half and half to cover the bottom of the pan.  Throw in several handfulls of the seasoning vegies and saute.  We are making some for now and some for later so we need alot!  You could also throw in some minced jalapeno or other spicy peppers but I did not have any on hand.  Also begin bringing a big pot of salted water to a boil AND get some rice started - I made 3 cups of rice.


Once the vegies are soft remove 1/3 of them and set them aside.  Add your ground meat - about 1 1/2 pounds or a little more (though I thawed 3 pounds and you will see why in a minute.)  In my case I have half lean ground beef and half ground turkey.  You could also add sausage for a different taste.  Add your seasonings - I have an Italian Spices grinder I used.  Another good one is Emeril's Bam Burgers seasoning mix.  Continue cooking until the meat is browned.  I "chop" it as I go with my wooden spoon too.

While your meat is browning and once your water is boiling drop your cleaned pepper halves into the boiling water for about 3 minutes and then remove.

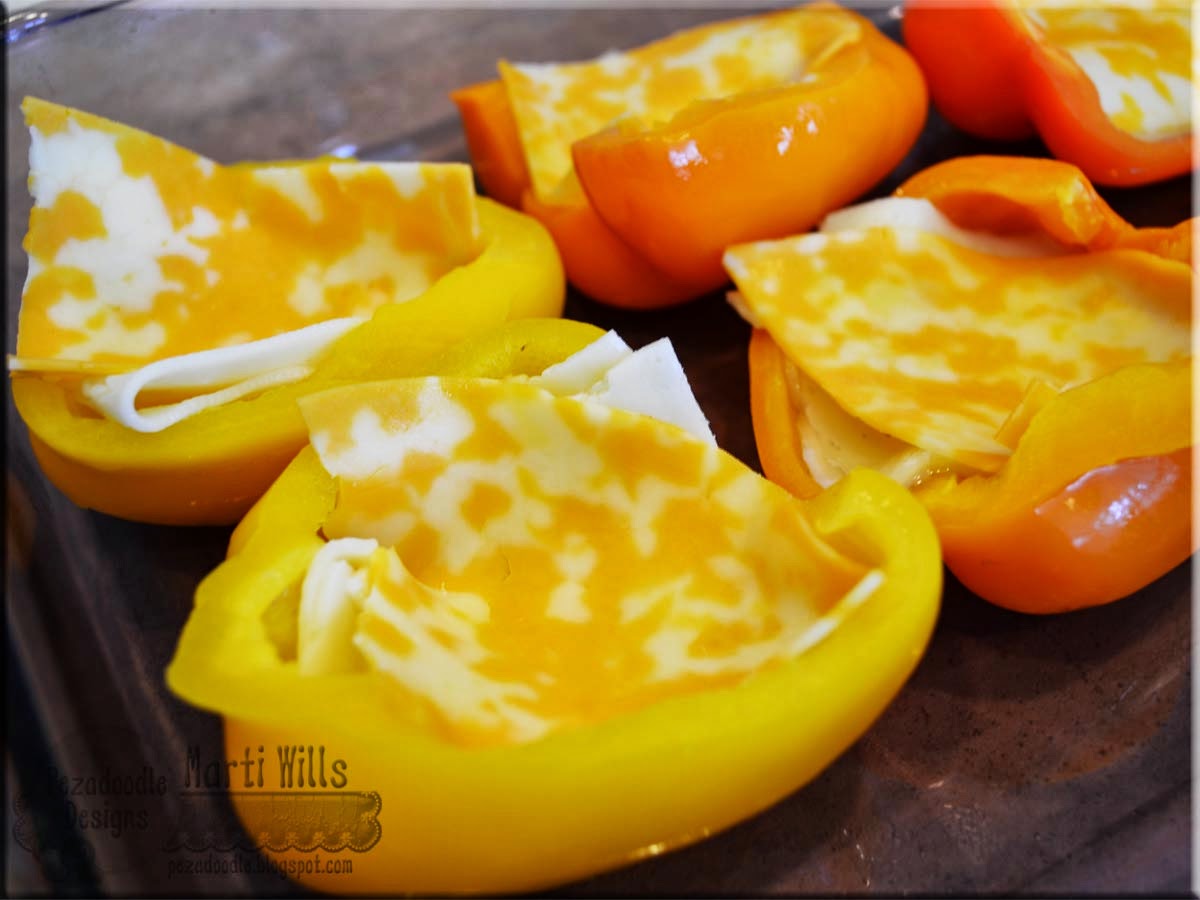
Arrange them in your baking dish and layer some cheese in the bottoms.  I used 2 layers of Havarti and one of Colby Jack.  Pepper Jack would also work really well here.  It was at this point that I found myself lamenting at the quality (or lack of) in produce now that I am not in southern California.  My peppers are so SMALL!!!

By now your meat should be browned or close to it.  Once it is add a can of stewed tomatoes and a can of tomato paste.  Mix it in well.


When it is heated through turn off the stove and add your rice - I have about 2 cups in there but adjust it to your families' taste - some may like more rice some more meat. 

Now fill those babies up and add a swirl of ketchup to the top.  Pop them in the oven at 350 for 20 minutes or so - keep an eye on them because you aren't really COOKING anything, mostly just melting the cheeses and browning the tops a bit.  You will only use about half of the mixture to fill the 6 peppers.  Which is great news because now you have leftovers to freeze to make life easier on another day and it didn't take any more time and energy to cook a double batch!  You can either freeze the filling alone (what I did) or assemble additional Peppers and freeze those.  The frozen peppers will make GREAT individual meals for someone to grab or  use them all at once to make a second meal for everyone.  Make ahead meal #1 done.

Remember the cooked vegies and the other 1 1/2 pounds of ground meat we set aside?  Once the vegies are cooled we add the remainder of our UNCOOKED ground meat - the other 1 1/2 pounds I thawed.

We are going to make a meatloaf to freeze right quick!  Throw in an egg, some bread crumbs and spices and form into a loaf.

Wrap in foil, place in a freezer ziplock and you have your second easy freezer meal done.  All you will need to do is thaw it, mix up a tomato sauce and bake.  Throw together some mashed potatoes and a vegie and done!  Make ahead meal #2 done!

We also have some leftover rice.  That's because we are also going to do an easy rice pudding for dessert!  OH how I LOVE me some rice pudding and this one doesn't involve standing over the pot stirring to make your custard.  For that I turned to Paula Dean (I know I know she has been is trouble lately and we won't get into that here - the woman CAN COOK.)  Get the Recipe.

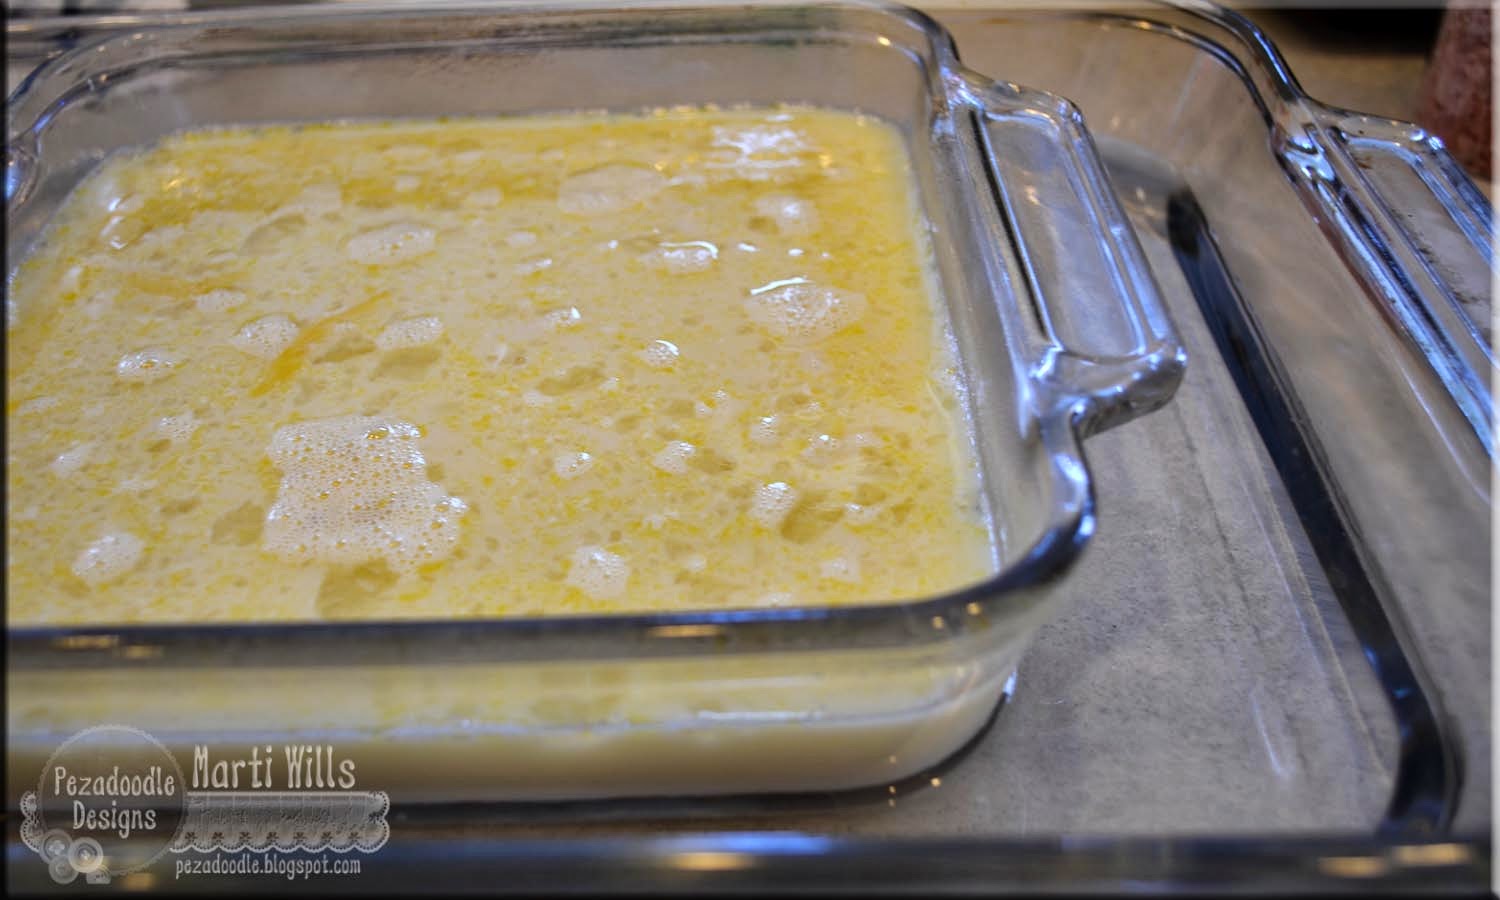
This rice pudding is baked - much like my bread pudding (which is to DIE FOR.)  BUT when you bake a custard type dish you need to set your baking dish inside of another larger dish of water like the pic above.  Throw it in the oven - easy peasy!

I did not add the raisins to mine but here it is - let me tell you it disappeared FAST!  When I make rice I usually make a 1/3 white to 2/3 brown ratio.  It worked perfectly in the pudding.

So there you go - without spending but a TINY amount of extra time in the kitchen you have made dinner and dessert PLUS two additional short cut meals to stash in your freezer (for those days when you realize you have spent way too long in your craft room!)  Now I have to get that Ropa Vieja recipe from Lourdes........

Saturday, September 21, 2013

Party time!

Hi all!

Hooray for weekends right?  So last week I had put a post up on Facebook lamenting how every day I say "Tomorrow is sewing day.  I am going to sit and sew."  I have a backlog of sewing projects I really want to accomplish -  TWO quilts, a wall hanging, a purse my step mom has requested, fall/Halloween table linens, American girl doll clothes - the list goes on and on.  So in the comments my (awesome) neighbor says "You jut have to drop Pez at the bus stop and go in and do it."  My cousin says "What's stopping you!"  So I think "That's it!  Tomorrow I'm doin' it."  So what's stopping me?  I will do laundry while I sew so that I am still accomplishing something and just DO IT.  Here is how the day went
  • Begin cutting out purse pattern
  • Go to put my laundry in the dryer, hmmmm the load that's in there is not dry....I could have sworn I started the dryer twice already....I start it again.
  • Discover I am out of interfacing - now I will need to drive out to Leesburg to get some (we live in a small rural town.)
  • Go back to put the next load of laundry in the dryer....CLOTHES ARE STILL WET!!!  Now i KNOW i have turned it on...Holler for hubby who is working from home.
  • Begin dryer assessment.  No heat.  Commence dryer dismantling...which then involves dryer insides cleaning


Disgusting!
  • We will need a new heating element.  So that means calling around to find it.  Good news, found it.  Bad news, now I am not only driving to Leesburg for interfacing but also ALL the way to Sterling for the element - about 45 minutes away.
  • While I am in Sterling I think Hey, I can stop by that nursery I really love and check for the Sempervivum Pezza has been begging me for.
  • Plant lady is apparently lonely since the Spring rush and decides to educate me on EVERYthing you could EVER want to know about succulents.  Interesting but I AM TRYING TO SPEND THE DAY SEWING.
  • Hubby and I were going to do lunch but now I am running late and he got a meeting put on his schedule - how about I hit the drive thru on the way home.
  •  I roll up to the drive thru at 12:32 along with every other human for MILES around.
  • I get home, eat my lunch, I have about 1 hour left before Pezza gets home, phone rings.  It's my good friend Amy (Pickled Paper) whom I haven't talked to in ages and SO miss her!  We talk and talk and then it's time to go meet the bus.
And this is how my EVERY day seems to play out UGH!  Though my day interrupting event yesterday involved picking up two itty bitty kittens to spend a couple days with me to recover from surgery before heading to the adoption center at Petsmart.


As I was squealing over them in the back room at the vets office I said "You would think after having rescued DOZENS of babies I wouldn't swoon over babies anymore but it just never gets old and the vet (BEST VET EVER) says "Nope, it NEVER gets old!"  These two are probably some of the best kittens I have had come through here.

But to be fair I do squeeze a bit of playtime in here and there and today I have a quick and easy birthday tag to share.


When I was cutting the circle elements for the layout I posted yesterday I thought HEY that would be a great birthday tag!  A Studio G $1 stamp is perfect in the center!  (If you missed that craze I do still have a few of the spring sets available.)

Once again I used foam tape to pop a couple of the layers up for added dimension.  I really think it's key to how nice the finished tag looks.

And now we are off to the party!


I am enetering this in the following challenges:

Friday, September 20, 2013

Going In Circles with Cut It Up!

Hi all!

This is Graham

He is a foster cat staying with us and he is a mess....

Graham says love me pet me love me pet me love me pet me love me pet me ALL DAY LONG!  He needs a home with an old woman who sits and watches TV all day and wants a cat to sit on her lap for petting.....ALL DAY....Hahahhaha!

So today is kicking off another great Cut It Up challenge!

This time we are "Going in Circles." You must use circles on your project in addition to a die cut!  


I LOVE the picture on the left - the look on Pezza's face is perfect!  I used an old sketch from Basic Grey I found online as my kick off point:


I didn't follow it exactly but without sketches I would be lost!


This Itty Bitty stamp by Unity was perfect for this summertime layout!  I colored it up using colored pencils - I love adding flavored syrups to my lemonade so that is the way I colored it.


To give it a touch of realism I coated the jar portion with Glossy Accents - Love that stuff!

For my circle elements I used a cut from the Lacy Labels Cricut Cartridge - I cut one at 3.5" and one at 4.5".  I added some bits of Waterfall Stickles to give it a little bling!

We have two wonderful sponsors for the challenge - you could win 5 Itty Bittys from Unity StampCompany as well as a $20.00 Coupon from As Cute as a Button!


Come join in on the challenge and see what the rest of the DT girls came up with at Cut It Up!

In addition to the Cut It Up challenge I was also inspired by the following challenges for this layout:

Thursday, September 19, 2013

Art Journal Tutorial for you!

Hi all!

It has been a whirlwind of activity around here these days!  Tuesday I had lunch with my buddy Suzanne (Scrap Bitz) and then went junk hunting around town.  I didn't find anything - I am on the hunt for old fence, old doors and a desk.  She found a couple cool things though and it was really nice to sit and catch up.  we don't get to hang out nearly as much as we did when we were running the magazine (Through the Craft Room Door.)  That morning I went to a gifted & Talented info meeting as the school is wanting to do some testing on Hollyn - I have to say I am much happier with the program in this school district than any of the ones the boys were in.  So we'll see where that leads.  Then I ended the night with a meeting for the Special Education Advisory Council - I was asked to be the rep for our school and while the meeting was interesting - we heard  our Superintendent speak and then covered the general business of the committee - I am not sure it is the right fit for me since I have had zero experience with special education other than Pezza's very minor IEP and wouldn't know the first thing about what is needed or best practices or current research.  So I may have to step down from that.  Then off to Petsmart first thing this morning for my turn taking care of the kitties the Rescue I work with has there.  Two very cute calicos greeted me today - no babies though - we are nearing the end of kitten season.  I think my day is clear tomorrow though other than a bit of house cleaning so I am really hoping to sit and sew.  What's on my sewing plate?  A purse for my step mom - got some CUTE fabrics, TWO quilts I would really like to make and Fall/Halloween table linens - so yea, I need to fit quite a few sewing days in!

But today I have art journaling for ya!  I have not been very good about reading blogs for some time now and I really miss it.  I get most of my faves in my email and every now and then I will take a minute to check one out and see what's going on - or i may see a post on Facebook and go have a look.  At this moment I have 1637 unread emails so you see what I am up against.....Anyway, I just happened to click on Tim Holtz's blog when he posted the tutorial for this month's 12 tags and I really thought it was quite good.  However, I have not purchased much of anything new in years and that includes none of the mass amount of products Tim has released.  SO I was lacking several of the thing she used but I decided I would just make do with what I had and see how it turned out.  (Frankly I have been skeptical for some time as to whether or not I REALLY need his specific brand of stuff or if I can substitute.) ONE day I will have time to do some real tests but for now here is my version broken out into steps for you.

Here is the end result in an art journal I was working in:


 And here it is step by step.


Now Tim started with embossing paste by Wendi Vechi which I don't have BUT I do have loads of other embossing stuff.  Nor do I have his stencils but they are too small for me anyway so I used a Crafter's Workshop stencil I already own and used Viva Decor Crystal Gel to emboss with.  Now right away I know this is going to react differently because I am pretty sure Wendi's paste is a matte white and the one I used was a clear gloss but whatevs - it sure is purty!  And of course it worked like a DREAM with the stencil as EVERY Viva Decor (Viva Colour) product always does.  HMMMM  not sure you can actually get this crystal gel so lemme look for a link.......YES of course Susana has it at SCACD!  So there ya go if you are wanting some.  Ok let that dry.

NEXT we take another stencil - again Crafter's Workshop - and acrylic paint - in this case I used Luminarte Silks in Ice - you can barely see it on the bottom left and upper right corners.  I just used a sponge to pounce a small bit of paint across the stencil - if you use too much paint it will seep underneath and that is no good!  Again let it dry.

NOW we want to drench it in color.  I used Luminarte Radiant Rain mists.  I began by misting the pages with water and then with Radiant Rains in Lemon Drop (old style bottle - been using this stuff for AGES), Fern, Teal Zircon and Apple Blossom - GORGEOUS!!!!  Now one real important point here - page prep.  I am not using gesso'ed pages.  If I had gesso on here it would sort of resisit the sprays and I want them to soak in so I have not "sealed" the paper with gesso.  I know there are some mixed media artists who insist you MUST MUST MUST always start with gesso - NOT the case.  It depends on what mediums (Products) you are using and the effect you want.  Now notice how we have two different effects with our two different types of stenciling - the Silks has taken on some of the color so it is a faint image and the Crystal Gel has resisted it PLUS because it is raised the color has pooled around the stenciled bits and on top.


Now we are using ANOTHER stencil and some brown Distress Ink - which I do have since it came out like a hundred years ago - all the new seasonal colors - not so much.  BUT I do have a few.  Ok now we are going to add yet another stencil layer using our brown distress ink and a foam blender - Walnut Stain and I layered it in a few areas.  Next I used a smaller design stencil - in this case very small sized sequin waste - to add yet another layer using a colored Distress Ink - Broken China here and layered yet again.  I noticed a really coll thing happens when you do this - the blue ink reacts with the brown ink and almost moves it out of the way.  It also shows up differently where it is used over the Silks image so the Silks image shows through. 


FUN stuff!  And we're still not done!


Now some stamping with Black Soot Distress Ink.  I used some stamps I carved myself - SO easy to do!  See my previous post about carving them.  I LOVE these leaves I drew so I used them.


We're ready for the final steps!  I LOVE to put quotes on my pages but you could use anything - stamped images, printed clip art, colored images...  I inked the edges and used my handy dandy edge distresser - the crazy Distrezz All or whatever it's called is too much for me :P  


Adhere them to the page and then I used a charcoal pencil to go around the edges and smeared it with a paper blending stump and my finger to really set them off.

The journal I was working in was not actually mine - it is one of the Circle Journals I am participating in.  I did two of them in this session:


I carved the stamp used on this page from a Dover Pictura image - A tutorial for that will be coming next week!  So whadda ya think?

Tuesday, September 17, 2013

Build your wings....

Hi all!

I am SO excited to see signs of Fall heading my way!  I am still trying to get my routine down now that school is in full swing but so far I am really liking how much I can get done in a day!  We took off on our last camper trip of the season this weekend and just about froze!  Luckily I had long pants and a light jacket for me and Pezza but poor Kevin did not remember to grab his jacket and we ended up having to go get him one :P  We headed to one of our favorite places in Luray, VA and headed out to hike in the Shenendoah National Park.  I found a hike that said it included a rock scramble for a portion of the trail where you would have to climb across rocks sometimes on your hands and knees!  YES PLEASE!  I so miss rock climbing since I came to VA from MO. 

See those blue blazes on either side of the rocks?  That was our trail marker!  So fun!  Unfortunately I have been SO So sick with allergies and hiking plus campfire smoke REALLY did me in.  Sunday I was a mess - talk about a violent over-reaction.  And I am pretty sure my asthma has returned - BOO.  Despite being ON antibiotics I was running a low temp all day yesterday and today.  Not fair!

I DO have an art journal page to share - although I only took one picture of it...???  What's up with that?  And now it's gone because it is one of the circle journals I have been participating in.  BUT I wanted to share it with you anyway:

It has some great texture going on and lots of layers PLUS this super cool image transfer from Dover Pictura - I am officially a Dover Ambassador!  I was supposed to start earlier this summer but my summer was not conducive to doing much artwork so I am really looking forward to getting busy with the absolutely amazing array of images available from Dover - and now DIGITALLY through Dover Pictura!  I have been using Dover images for my artwork for literally decades!  They make great coloring books and clipart books as well as super reference books for everything under the sun.

I began the page with a few random light washes of yellow and then laid down a stencil resembling cracks and sponged on Teal Zircon Silks paint.  Then I stamped with one of my original Pezadoodle Background stamps - Dropped Scallops in brown Archival ink.  I added bits of pale blue wrinkled tissue paper and then rubbed lightly across it with Gold Inka Gold to bring out the texture.

I got my image from the Dover Pictura digital collection 150 Silhouette Designs.  I printed her off on my laser printer - it is important to do it on a laser if you want to use it for an image transfer or the ink will smear (don't ask how I know.)  You can get laser prints at places like Staples which is where I will be going soon for COLOR laser copies soon for another project I have in mind.  Once I had her printed I just spread a layer of gel medium where I wanted her - not too thick - and laid her face down in it.  After it dried overnight I wet the paper backing and gently rubbed it off with my finger - perfect transfer!  This is different than just printing her off and gluing her down because you can see the background behind her - she becomes a part of the layers.  After I added the quote I finished off with a feather stencil.  I mixed Kiwi Luminarte Primary Elements with my Gel Medium and smoothed it on over the stencil - gorgeous!

Are you familiar with Dover Publications?  What can you do with them now that they are digital???  For starters, with the holidays approaching, check out the loads of fabulous vintage images they have.  Check out the Halloween collections being featured right now - vintage to contemporary including some great Dia de los Muertos (Day of the Dead) images and photoshop brushes.  Or enter the Very Victorian craft contest - Dover has plenty of fantastic Victorian image collections to choose from!  What are you waiting for???

Wednesday, September 11, 2013

Party tag (and a hot debate!)

{I wrote this blog post last night and forgot to hit Publish.  I thought oh I will just publish it today and then I have battled with it all day because today is 9/11.  I attended the 9/11 ceremony at Pezza's school this morning.  I spent a lot of time thinking about it today.  Like most of you I remember everything - where I was, how I felt.  I was setting up for a membership drive in the lobby of the Poly Sci dept that morning for the Political Science Honor Society.  The TV was on but I don't remember what was on it.  A friend came running down the stairs shouting....he was fumbling to change the channel.  I couldn't understand what he was trying to say...a plane crash...maybe more than one...they think it was on purpose.  On purpose?  We watched as smoke poured from the World Trade Center...and then another plane flew into view.  It was too low.  It was going to hit the other building!  What's happening???  It went right into the building!  It didn't try to move......The common area of the Poly Sci building was usually so loud....it was just silence.  I thought I was going to be sick.  And then another Poly Sci student yelling for us to come up to the dept.  The phones were ringing off the hook,  reporters, questions, we had a professor who specialized in Arab studies...terroists.  WHAT?  A good many of our classmates went on to DC after graduation just like I did a year later.  None of them could be contacted....It felt like the disbelief went on for days....But we healed, we moved forward...and we continue to.  And so I will publish my post because the evil people who flew those planes into our buildings wanted our lives to stop and I refuse to stop.  So here is my post.} 


SOOOOOO...now that I am out in front of the house alot more in the morning walking to the bus stop I am realizing how many people drive ENTIRELY too fast on our street!  Not like we live on a highway or anything - we live in a neighborhood - our street is a half circle with cul de sacs going off of it.  Now I am a little rough around the edges and not the type to hold back.  So when I am standing on the sidewalk and see a car going to fast I will walk right out in the street and scream at them.  Which is what I did when a Sears work truck went by the other day - and did he slow down??? NO!  So I got on my bike and found the truck and called in and reported him but seriously - it's ALOT of cars!  My neighbors notice it too so I was brain storming on ideas with one of them.  Here are what we have so far:

  1. Give the kids airhorns and seat them on the sidewalk to blow airhorns at cars we tell them are going to fast.
  2. Put one of those plastic "Kids at play" turtles up near the curb - holds a red flag.
  3. Call the police dept. and request a speed trap be set up.
  4. Have the cop in the neighborhood park his patrol car on the curb for a while.
  5. Set up cardboard cut outs of kids about to run into the street
  6. Actually THROW the cardboard cut out INTO the road in front of a speeding vehicle so they think they hit a kid and scare the living shit out of them (my personal favorite BUT we decided probably too dangerous and likely illegal.)
Where DOES one buy an airhorn?????

We had a birthday party to attend - and so it begins!  The little boy across the street turned 6.  Despite having BOXES (plural) full of cards and such I have nothing for birthdays.  My long term blog followers will remember I was once an avid card maker but I gave that up.  I was making beautiful things but not useful things.  SO I need birthday cards/tags/bags.  The Cricut is perfect for that so I whipped one up:


I used the Sweet Treats Cricut cartridge.  the tag is 4.5" and the party hat is 2.5".  It has some great basic tags and cute images to go on them.  After cutting them all out I inked all of the edges.  It really makes the finished tag looked "polished."


One thing that makes a HUGE difference when putting the layers together is to use foam tape - it adds fun dimension.  I finished it off with a long neglected craft room staple - Stickles in yellow and firefly.


I am entering  my tag in the following challenges:


Now let's have a bit of a chat about a real hot button topic on papercrafting message boards - what will happen to this adorable tag now that it is actually on a gift?  Well obviously it will go in the garbage which is where gift tags GO after they have been put on a gift.  And so do cards and gift bags.  NOBODY keeps these things folks and they shouldn't.  Ever watch an episode of hoarders?????  There is never a shortage of posts where someone is outraged that their handmade card/tag/bag wasn't given the proper acknowledgement or worse it was not kept forever.  It went in the trash.  I am ok with that.  I can't possibly expect someone to hide them away and keep them forever.  Besides what difference does it make REALLY whether it is stuffed away in a drawer somewhere never to be seen again or stuffed away in the garbage can never to be seen again?  I had fun making this tag.  I liked every step - choosing the color scheme, picking the cuts, inking the edges, popping it up with foam tape, adding the glitter glue and figuring out the best way to tie it onto the gift.  I did it for ME.  I get joy out of the creating.  In fact I often don't care what happens to it afterward :P  NOW if you can't bear to have your hard work and expensive supplies go into the trash then don't make items that are to be given away.  This is where scrapbook pages come in - I can spend hours putting it together, use all sorts of supplies on it and know that I will keep it forever and perhaps whoever ends up with it after me might too.  Same with my mixed media pieces I do.  And that is a big reason I quit making cards - it just seemed like a waste to put all that work and supplies into something and then be too afraid to give it to someone because it would be thrown away.  Do I think I should be singled out and my work praised by the recipient - not really.  Unless they are also papercrafters they aren't going to get it, and may not even realize it was hand made.  That's what blogs and papercrafting galleries are for :)

Besides - I don't like gifts of any type being given with intricate strings attached.  It sucks being on the receiving end of that and I won't do it to anyone else.  So what do y'all think?  Am I the only one who feels like this?

Sunday, September 8, 2013

Mmmmmm White Chicken Enchiladas!

Hi all!

The first week of school went fantastically!  (Knocks on wood.)  Pezza likes her class and her teacher.  She even likes SCHOOL FOOD!?!?!  WTF????  Kid throws a fit about everything I serve her here at home and comes back with these glowing reports of cafeteria food - whatever.  It may wear off eventually.  I am not overly thrilled with her eating cafeteria food - not sure I am convinced of it's quality and nutritional value but.....I can't fight EVERY battle.  For now it means less work for me right?  I had an interesting experience at the us stop too.  I am Cuban - my dad was born and raised in Cuba.  My mom is Cajun so I guess really I am half Cuban to be exact. My dad was sent here right about when Castro took over - my grandparents finally made it out sometime after that and they lost everything.  The details are fuzzy as it was not something open for discussion with my dad.  Anyway, I have never met another Cuban other than family members.  We didn't live in Miami and I guess I haven't actively searched them out or anything. So I am hangin' at the bus stop one morning with my coffee - in my fave great big Cuba mug - and a couple comes up and asks me if I am Cuban.  Turns out they came here about 10 years ago so I thought that was really neat!  And their daughter is in 1st grade just like Pezza!

UNfortunately I WILL be spending my freedom tomorrow sitting in urgent care as I have been sick for a month and just can't kick it.  Now I have been running a fever all weekend SO I guess I am not going to get out of it.  I have some hideously bad allergies, especially this time of year.  Couple that with some scented garbage bags I bought on accident and tried to use anyway because I didn't want to waste the money and yea - I am hurtin'

BUT before I head up to the easy chair I have been sleeping in for weeks because I can't lay flat I wanted to throw up another cooking post with some time saving ideas.  Last week I told y'all how I do my seasoning veggie prep and chicken stock.  So let's do some cooking with it!

I made white chicken enchiladas.  NOW if you used a whole chicken in the stock like I did you can then turn around and de-bone it for the enchiladas OR you can grab a rotisserie chicken like I did OR just bake chicken for dinner one night and make extra, then the next night make enchiladas.


Here is my stack of ingredients - yes it looks like a lot BUT you will make three meals HOME MADE - so that's less work later, tastes better and it's better for you!  I have:

  • Chicken
  • Seasoning vegie mix
  • 2 cups chicken stock
  • Poblano pepper
  • Cubanelle Pepper (add in hotter peppers if your family likes it hotter!)
  • Spices - Cumin, Chili Powder, Paprika, Nutmeg (yes- nutmeg is fantastic when paired with chicken!)
  • Flour
  • Butter
  • Olive Oil
  • Cream Cheese (I use low fat)
  • Green Chilis
  • Corn
  • Cilantro
  • Tortillas (I prefer four but you can use corn if you like the traditional style)
  • Colby Jack Cheese
  • Pepper Jack Cheese
  • Green chili sauce/ green enchilada sauce  (some prefer red sauce)
  • Avocado
  • Tomato
  • Lime
  • Sour Cream
  • Salsa mix (I will tell you how to do that and prep it ahead of time at the end)
 This actually goes together pretty easily since you have done the seasoning vegies all chopped!  Start by putting butter and olive oil in the bottom of a large pot and heating it on medium or so.  Now I should warn y'all I cook like I live - by the seat of my pants!  So that means I don't measure anything but I will try to give you a close estimate.  I would say 1 1/1 - 2 tbl each of butter and oil - enough to saute AND make a roux to thicken your sauce.  While that warms up chop up your peppers.  Once the oil is ready throw in two good handfuls of your frozen chopped seasoning vegie mix and your peppers.  Saute until onions are clear.  Then sprinkle in enough flour to cover the bottom of the pan (about 3-4 Tbl) and cook this mixture, stirring, until it has browned slightly.  Now slowly add the broth while stirring so your mixture thickens.  Shake on your seasonings - go light on the nutmeg and heaviest on the cumin.  If you are unsure if you have added enough of a certain seasoning taste it, add a bit ore and notice how the flavor changes.  This way you start getting a feel for how each one changes the flavor.  Heat for a few minutes and then add 3/4 of the block of cream cheese.  Stir occasionally on medium low until the cream cheese is melted. 


Now add the chicken, corn and green chilis and heat through.  Throw in the Cilantro last and cook a bit longer - 5-10 minutes.  I used half a bunch of cilantro - just leaves - chopped up.


You're ready for assembly!  See how quick that was?  Here is how I set up for assembly.  Tortillas, filling, two cheeses all nice and dhredded in my food processor I just treated myself too :), and a pan.  SHRED YOUR CHEESE YOURSELF.  It tastes SO much better!  Now pans - if you look in the pan section in Target or Walmart you will find foil pans with lids - these are AWESOME for preparing meals ahead!  you may need bigger ones if you are feeding more people - these will hold 5 enchiladas (they are a little over-stuffed in my house!)  lay out a tortilla, a spoon or two of filling, some cheese, roll it and stick it in the pan.  I make a pan for now, a pan for later and still have enough filling for a third round which I freeze too (because I get tired of rolling them up.)  You now have 3 meals - 1 for now, 1 super easy re-heat for later and 1 pretty quick slight-assembly-needed one for later. 


Once they are all in the pan you need sauce - I like green sauce.  I used to buy Old El Paso in a can but at Harris Teeter I discovered this one:

And after reading the ingredients and the nutritional facts I decided it looked MUCH better - and it tastes better too!  So look for it or get the can if you can't find it.  Either works.


Pour on the sauce and top it with more cheeses.  Now Pezza won't eat the sauce or the pepper jack cheese so I make hers with colby jack only and then I leave off the sauce.  Pop it in the oven on 350 - you are really only melting the cheese since the inside is warm.


While they cook make up some salsa.  This is another item I prep ahead.  The container on the right was pulled out of the freezer - I just chop up some tomatoes and throw them in.  So what goes in it?  Jalapeno peppers, green onions, red onions, salt, lime juice, cumin, chili powder and cilantro.


Boom - instant salsa! 


YUMMMMMMMMMMY!!!!!!!