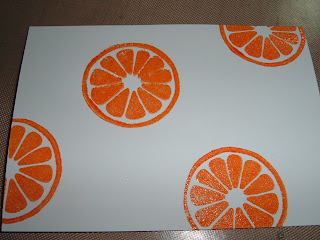
 Today is the second tutorial for embossing. I made my sample using this weeks fab sketch from julee over on poetic artistry. I had a number of raves about the embossed oranges at the end of the last tutorial so I decided to use them again since they are perfect for todays lesson - scratch n sniff cards - YEP! my oranges smell like oranges!! Now how cool is that? This was our technique for last month's technique club with my SU demo, Stacey. The oranges are from SU's Tart N Tangy set that was on special recently.
 So HOW do we do this? Unsweetened kool-aid mixed into your clear embossing powder!! In fact you can mix ANY unsweetened powder in - I am anxious to try some other such as cocoa powder, nutmeg, cinnamon - oh imagine the Christmas cards :) - just remember UNSWEETENED because sugar will burn when you melt the powder with your heat gun.
so the ratio is 1 part powder and 2 parts clear embossing powder. some people use actual teaspoons but i have a favorite measuring scoop i use for everything - you will see it often:


Be sure to let the image cool completely before handling or the kool aid may smudge a bit! now when you scratch the oranges you smell oranges! For my card i smudged the edges with more sunset orange dye ink (so it dried faster) and mounted according to the sketch i was following. the orange dots are orange stickles. The sentiment is a studio G stamp from my vast collection. Remember for these - sand them a bit before first use and your image will be crisp and clear!
Tomorrow we will do a background with shimmery embossing powder and then we will be on to distress embossing powders and even some UTEE!


Wow! Kool-aid? KOOL Tutorial!! :)
ReplyDeleteMmmm... that card looks yummy! Thanks for sharing!!
How clever! Great card. TFS
ReplyDeletewhat a great tutorial, can't wait to try this!! Thanks sooo much.
ReplyDeleteI've always wanted to try this technique. I need to see if I have any Kool-aid! Awesome job!!
ReplyDeleteCan I eat the card? ;) Nifty cool technique!
ReplyDeletethis is awesome!!!!!!
ReplyDeleteCant wait to try this. Hope you don't mind I linked this technique on my blog
ReplyDeletegreat tutorial,
ReplyDeleteYour work is really appreciable.First time i have visited your blog so i think it is very good way of introducing yourself.Thanks for sharing.