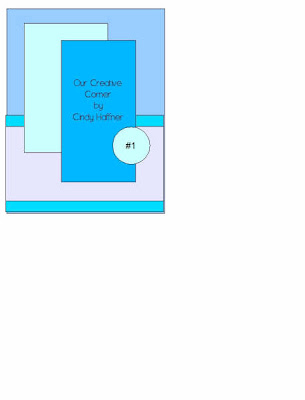
 And my card - a father's day card for my dad - yes i just made it - somehow i thought father's day was next weekend EEEEEK!!!!! oh well he is late for everything anyway so it's all good. I turned the sketch on it's side and changed where i put my little embellishment to fit my image.
 I have had a great many requests for tutorials on the ranger and other products i sell in the store so i have finally given in and today will be the first installment. i will focus on one product family each week and post tutorials using it in a variety of ways since the products can be SO versatile. This week we will look at embossing techniques with different types of embossing powders. Today is the basics using clear embossing powders. The card above has two techniques with the clear detail embossing powder.
First your basic tools:

for the first image, Dancing with Pezzy, I want embossed black outlines so after swiping the embossing buddy across the cardstock I will ink up using rangers pitch black pigment ink and stmp onto my paper. pour clear embossing powder over the image - you don't need to rush so that you make yourself nervous as the ink will stay wet for several minutes. gently shake off the excess, lightly tap the back if necessary but not too hard or you could kock off the powder you want too.


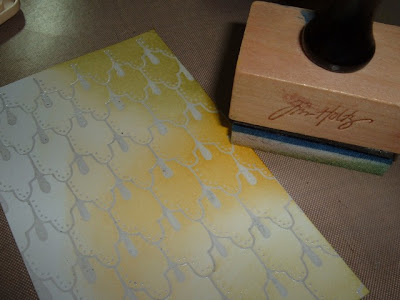
Next we will do our background piece using Drop Scallops. Embossing powder acts as a resist. I swipe the cardstock with the embossing buddy. Ink up the background stamp with the versamark. Versamark is a colorless, versatile sticky ink. Stamp onto your cardstock and then cover in clear embossing powder. Heat until melted and shiny:
Next i want to color my background to make my design pop out. I ADORE the ranger foam ink blending tool. I wanted to do something in yellows and greens to match Pezzy so i picked out a couple inks to start with:
I ink up one short side of the foam with one color. The trick to getting a gorgeous, soft covering of color is to keep the tool in motion - i work over a non-stick craft sheet and touch the foam lightly to the sheet and start moving it in a circular motion and then move onto the paper. this also makes the edges automatically darker (works FAB for cricut cut detailing too).
Below are two images stamped with colored pigment ink and then clear embossed to show the difference. The top two are embossed and the bottom two are not.
I will cover other powders and techniques throughout the week including the fantastic distress embossing powders so stay tuned!!! Have fun!


FAB card! It's so fun! Love all the embossing and the colours you used! Thanks for playing along with us!
ReplyDeleteI love the tutorial!! Keep them coming, I need all the help I can get! LOL
ReplyDeleteOh cool awesome job on this, thanks for playing with us.
ReplyDeleteThat embossed orange and citrus looks good enough to lick!!!!
ReplyDeleteI think it's a great tutorial! Some people may think it's basic, but it's always the BEST place to start, plus, some people may just be starting out, or for peeps like me, I had no idea a freaking buddy existed!!! You have no idea how much I need that! I didn't even KNOW about it!!! Excellent tutorial and a wonderful way to show off clear embossing and the great things about it! C and C give it TWO thumbs up. (there's only one C, but it doesn't look good solo! Ebert was never the same without Siskel..or is it the other way around???)
Fab card and great tut, thanks
ReplyDelete