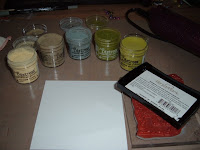
 I am back with a tutorial for distress embossing powder! YAY!! these are absolutely increedible if you have never used them. they have a totally different look from typical embossing powders. the sample i have uses this weeks Sketch For You To Try from Jen's blog.
and here is my card - this stamp is perfect for these powders:

Supplies: image stamp - a stamp with a lot of surface area is better - these powders are not as stunning on line stamps. stamps done in sort of a sketch form are ideal. pezadoodle has a line of these coming out soon that have been designed specifically with distress embossing powder techniques in mind. in addition you need your embossing buddy, piece of cardstock cut to size, versamark, various colors of distress embossing powder, heat tool.


Continue with all of your colors until the image is covered with powders. carefully lift it up and hold it over a trash can (or tray if you want to save the mixed colors). gently tap your fingers on the underside of the card so the powders dance around a bit but stay mostly in place - this will ensure good coverage. dump the excess.
the colors are not going to be EXACTLY only where you wanted them - this is not an exact technique but they should be mostly where you intended them to be! now working under a strong light so you can see well, heat the powders and melt them. it is very difficult to see the change but they don't take any longer than regular powders. let the image cool completely before touching. they will all rub off if still warm. once cool test an edge to make sure they are melted down. if they are not you can re-heat a bit. if they are then rub all over the image to release the distress crystals. at this point you can add matching distress ink to the edges or even onto the image itself with blending foam.

keep an eye out for more tutorials - things will become more regular once my company is gone!! next up i will focus on perfect pearls powders - these things are INCREDIBLE!! in addition there are other exciting things happening here at the Pez-A-Doodle Studios. All Tsukineko products are in the mail and on their way to us so those orders will be shipping in the next few days. I am still working on getting the Inkadinkado $1 clear stamps in so watch for an announcement on those SOON! new stamps are in production and these are really unique! a collaboration between us and sugar and scraps - look for those in less than a month!


No comments:
Post a Comment