and we're back up and running with tutorials! YAY! so next product focus is Perfect Pearls - little pots of gorgeous shimmering powder that can be used in lots of ways. these are different than other mica powders like pearl ex because the binder is built in so no need to use gum arabic.
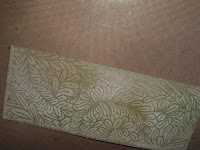
the sample card is for my brother - main image is two stampscapes stamps colored with copics. panel along the bottom is a background stamp covered in various green perfect pearls powders. that is what i will show you today. and of course there are bead pops on the corners - when are there NOT....

 first supplies: image stamp - doesn't have to be a background, cardstock cut to size, dye ink and foam blender if you want to color your cardstock a bit, versamark pad, perfect pearls powder(s), mini mister with water, small soft brush (cheap) and large soft brush.
 i colored my cardstock a bit so it was not stark white - optional. or use colored carfdstock or even black which is very effective with perfect pearls. be sure to let it dry or use a quick zap of your heat gun.
 have your perfect pearls open and ready. ink up your stamp really well with versamark (or perfect medium but i prefer versamark). stamp on to cardstock.
 dip your small brush into the perfect pearls powder. now there are two ways to apply the powder. mine is a background and i want the greens sort of random. so i hold the brush over the image and tap it in various spots with the three different greens so it is spread out - you don't ned to cover completely - a little goes a long way. the other option is to simply dip your brush in and then lightly swish it over the image where you want the colors for a more controlled look - almost like painting.
 then for the background randomness i just swished my brush around lightly until powder was stuck on the whole image. it will stick to the versamark.
 notice there is extra powder left over - like using glitter.

use the large soft brush to swipe away the excess.

now just your image is colored - there will be some shimmer to the whole thing which can't be helped but the image will be most vibrant.

Edited to add: Now mist the whole piece lightly with plain water to set the powder. Your cardstock WILL curl at first - DON'T PANIC!!! this is normal - it WILL flatten back out as it dries - i don't know why - it's just magic....now mount/use as you want!
how easy is that!!!

I also wanted to have a sample to show you of the Perfect Pearls used on black cardstock - however due to an early rising baby the card is not done but here is the start of it! perhaps i will complete it later....but you can still see how gorgeous it looks using the pearls on black!
Be sure to check out Cat's sample too!!!! it should be up later this morning!
be sure to stay tuned for more this week!!!! next up - making your own shimmering mist - more versatile and economical!
happy stampin!!


This is just awesome Marti!! I'm trying this!!! I hope if i have questions, I can yell for HELP!
ReplyDeleteWOW I just love it! Great job!
hugz
What is the mister for? I don't see it used in the tutorial. Do you use it after you brush away the excess? This is so neat!
ReplyDeletegood eye nicole!! thanks for alerting me and yes you are correct! i edited up top!
ReplyDelete