
I bet some of you are feeling the first hints (or more) of Spring in the air! Pezza has been getting quite a bit of outdoor playtime which I am happy about. We have even fired up the grill a couple times.
My little grandson turned 3 months this weekend - I don't know if I posted it here or not but a few weeks ago his daddy (my son) took off for San Diego with Brennan and Jess quite suddenly. Just about broke my heart in a million pieces and Pezza and Kevin's too. We have slowly been adjusting to it but I sure don't like it one bit. So now both boys live far away :( Not ideal but they can't stay home forever I suppose.
I have been occupying myself with some studio time to take my mind off it and I am super pleased with the piece I have for you today! This has been rattling around in my head for several years now and to be honest, having the Cricut Explore to custom cut my chipboard pieces for it really got me itching to get it out of my head and onto a board! The huge mug and giant steam swirls are cut from an old cereal box using my Cricut Explore - amazing! I love it! This box was a little sturdier than the usual smaller boxes so I just had to choose the heavier cardstock setting when I cut it. Simple! Even the thin ends of the swirls! The whole piece measures 12" x 10" and is done on a piece of MDF.

It is near impossible to show you the full extent of the shimmer and dimension of this piece but I will try!
I have been doing mixed media pieces for several years now and I have tried to experiment and stretch myself quite a bit when working on my backgrounds but I was beginning to feel unhappy and frustrated with my work so I thought I would go back to the beginning and do it the way I did initially. I enjoyed it a lot more and am very pleased with the result.

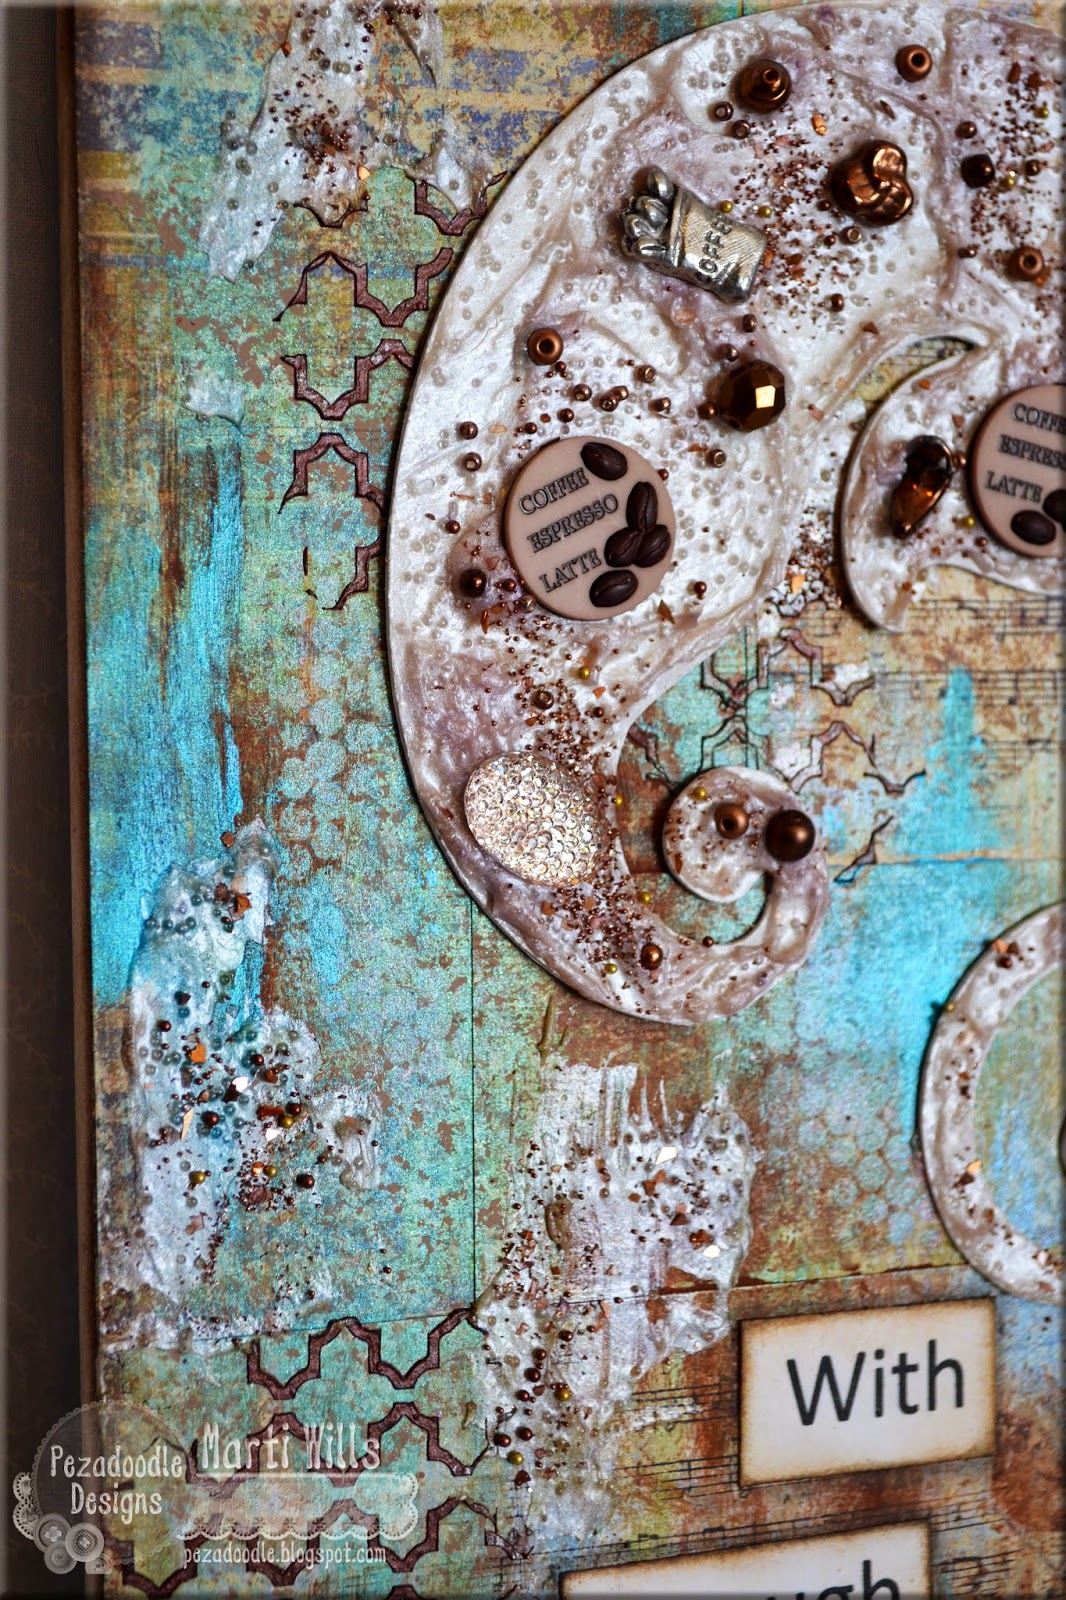
Here is a close up of a portion of it - the background began with several rectangles of patterned paper from a very old paper pad I found in my stash. I used a sponge to dab on Buff Acrylic Paint and then went over it again with Nutmeg ColourArte Silks. Once dry I layered on several more colors of Silks - Carribean Mist, Moss Green and more Nutmeg as well as a darker brown Acrylic craft paint by dry brushing and using my fingers. You can also see the hints of purple in the upper right corner of the picture above - I sponged on a bit of Wisteria Silks through sequin waste. I had added it to the coffee mug and needed to also incorporate it into the background for cohesiveness. The parts of the background that look like they are glowing are a result of the magic that is Silks Acrylic Glazes!

I needed to add a hint of texture so I used a stencil and some of the amazing new Radiant Gel in Autumn Leaf. It is the same thing I used for the coffee in the mug. Just look at that crispness - never gets old! Not ever and now with the Radiant Gels it is so easy to achieve this look.

Here is a better look at the mug and the coffee. The little white foam swirl was one of the layers of this coffee cup and I embedded it right into the Radiant Gel while it was wet.
But let's talk about the MUG! This is probably one of my favorite techniques of all time and I just knew it would be perfect for a mug. It's a little messy but SO worth it!

You need to start with a fairly sturdy piece of chipboard for your base. Paint the chipboard with Silks- I used Carribean Mist - a medium to dark color works best. Next I coated it with Versamark and then several layers of UTEE - Ultra Thick Embossing Enamel, melting them each and adding more UTEE until I have a nice thick coat. Gather several colors of Primary Elements at the ready. Now smoosh it down really good into a Versamark pad so the surface is good and sticky. Take a small soft brush and dip it into the Primary Elements powder and brush it onto the sticky surface of your piece. Repeat this in a random way around the surface of your piece. DON'T cover the piece completely. It is ok if some of the colors mix and overlap. Once you are happy with the placement of the powders get some clear embossing powder and have it ready. Heat the piece up again until it is melty. Now quickly sprinkle the embossing powder into the powder areas and melt it. It will "fall through" the powder and create a sort of crackled webby look. Repeat this process until you are satisfied. The powders will sort of "float around" in the clear coating of UTEE. When hubby came in and saw it he said it looked like a real ceramic coffee mug!

And now the swirls of steam! I mixed up a glorious batch of shimmering gel using regular gel medium, clear micro beads and Primary Elements powders in Oyster and a touch of Mocha Rose. I painted the swirls white and then piled on the shimmery gel. Then I embedded some coffee themed buttons and charms along with a few beads and a sprinkling of Gala Glitz which is a mixture of microbeads, shards of glass glitter and glitter. I added a bit of the mixture here and there to the background as well....
As for the saying, everyone who knows me knows I drink coffee ALL the time. Like all the time. I do believe "With enough caffeine...Anything is possible!"

I LOVE this. I want to try this, but I am new to all of this and I have some studying to do. I am not familiar with a lot of the products. Great Job!
ReplyDeleteThis is so cool! Glad you finally got it out of your head! And I hadn't heard about your son moving with the baby - I'm so sorry :( Hopefully a trip to San Diego is in your near future!
ReplyDeleteLove it....thanks for sharing your techniques!
ReplyDeleteI'm with you, Marti! I drink coffee all the time, too, even it if's 100 degrees outside. And I love your project today, and your coffee mug does look like real ceramic. TFS your fun techniques!
ReplyDelete