WARNING - pic heavy post today!!
This first gift set has focal images based on t!m's
tag # 9 tutorial and is done for
Jen's Saturday Sketch For You To Try challenge:
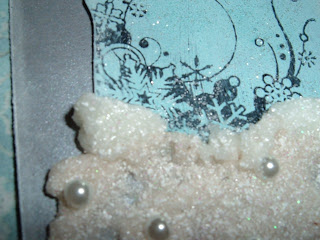
 sorry for the awful pics - the light has been really bad here lately! here are some close ups:


 i cut the image piece with my new nesties. stamped with black archival ink and then smudged in pine needle and fired brick distress inks with the ink blending tool. tree is stamped with peeled paint distress ink and the sentiment with fired brick. the grungeboard pieces are painted with the silver paint dabber. instead of tiny brads i used a drop of mushroom dimensional pearls in each hole of the grungeboard and it dried in this weird cool way so it looks like old beat up brads! stamps are inkadinkado and sentiments are studio G. All items available at Pezadoodles!

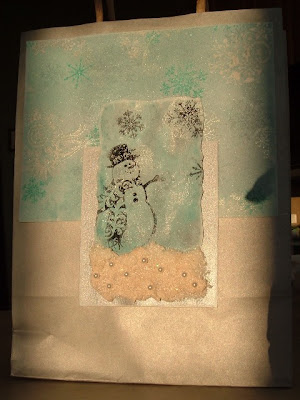
next set up was done using MJ's sketch from last week (yea yea i know i am late EEK!) and t!m's tag 10 tutorial:


 Check out that 3D SNOW!! directions below. I did not have any pattern paper i liked with these so i made my own - stamped and clear embossed some snowflakes on white cardstocke. mixed up two pearl mists using the same reinkers as the paint dabbers used on the tag - cloudy blue with pearl perfect pearls and pool with perfect pewter. i sprayed over the whole page. when dry i stamped more snowflakes in cloudy blue and pool and then wiped all the inks off the embossed snowflakes. perfectly matching shimmery paper! Again check out Pezadoodles for supplies! and now on to the snow...
 gather your supplies: clear UTEE, white UTEE, holographic embossing powder and glossy accents. you will also need a small palstic container and mixing stick and something to measure with - i used a cap from a mini mister - i never put them back on anyway (organization is hopelessly beyond my reach).
 your measuring tool doesn't need marks or anything - it is 3 parts clear UTEE and 1 part white UTEE - so here i used 3 capfuls of clear and 1 capful of white. add 2-3 pinches of holographic EP.


next squirt some glossy accents into the powders and mix it in really well. keep adding glossy accents until you get a mixture the consistency of cookie dough.

 spread it on your project, embed charms or other items into it and let dry!
don't want 8 ounces (and $17) of UTEE just for a little snow on your cards? get a premixed jar of powder with or without the glossy accents here. Remember t!m's 12 tags kits are also available.
how cool is that! now go have fun!!


Wow! You've been busy!! Great creations!! and cool tutorial!
ReplyDeletevery nice, love the snow, thanks for the tutorial and for using my sketch.
ReplyDeleteHow fun this looks! I've been fighting getting the thick Utee powder so you've sold me on it. I love the tutorial!
ReplyDelete